Admin Dashboard
Node is gated with authentication. In order to interact with the node from any app, you need to register a decentralized identity. We have build an Admin Dashboard which is a web application designed to streamline the management of node states within your system. Connected with the API provided by the Admin Client API, this user interface offers a user-friendly platform for overseeing and controlling various aspects of your node infrastructure.
Access Admin Dashboard
The node operates as a server for the Admin Dashboard and can be accessed directly through a web browser.
The Admin Dashboard is locally available at
http://localhost:NODE_PORT/admin-dashboard/ but you can also use application
deployed on Github Pages at
https://calimero-network.github.io/admin-dashboard/.
NOTE: Update
NODE_PORTin the placeholderhttp://localhost:NODE_PORTwith the--server-portvalue defined during node setup in Getting-started
Setup
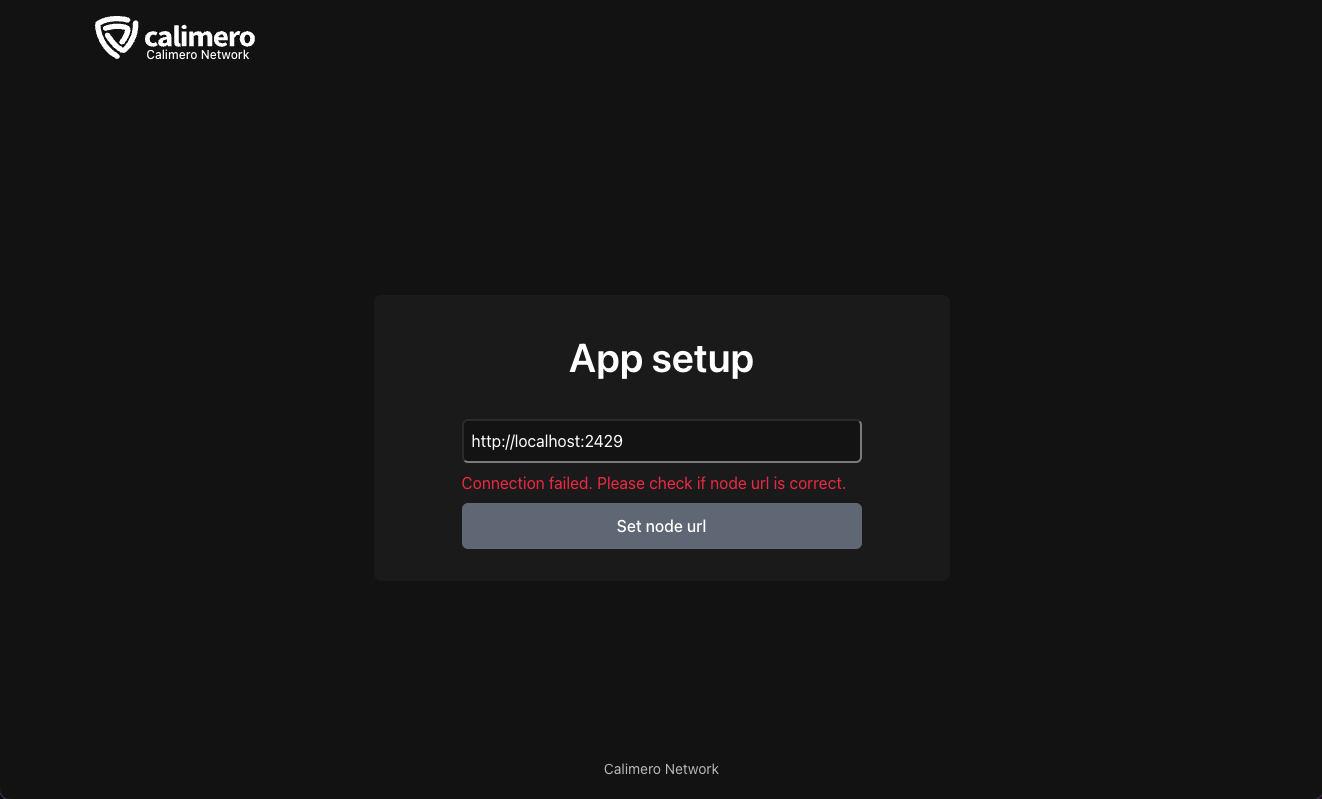
After the initial setup you will see the setup page where you need to enter node URL.
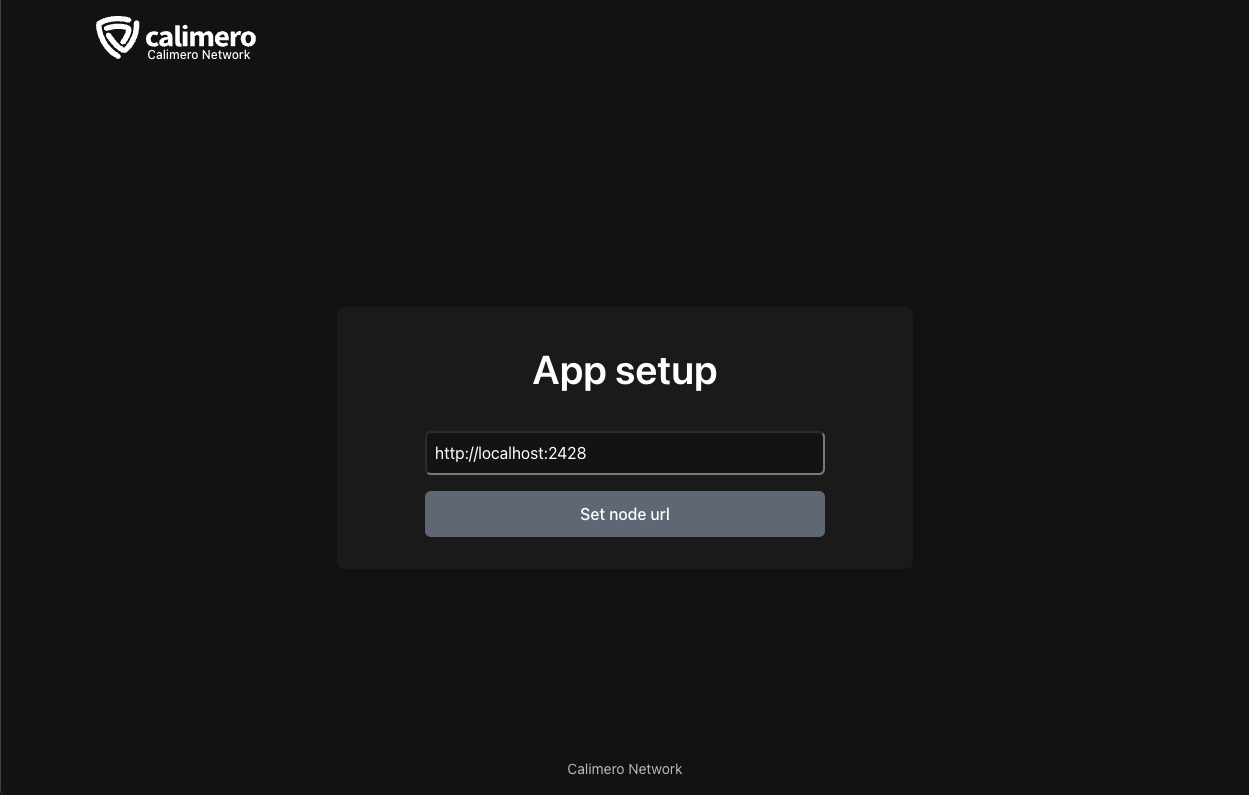
NOTE: Error occurs if the entered URL is not valid node url or the node is not running
Login
After button "Set node url" is clicked you will be redirected to select wallet page.
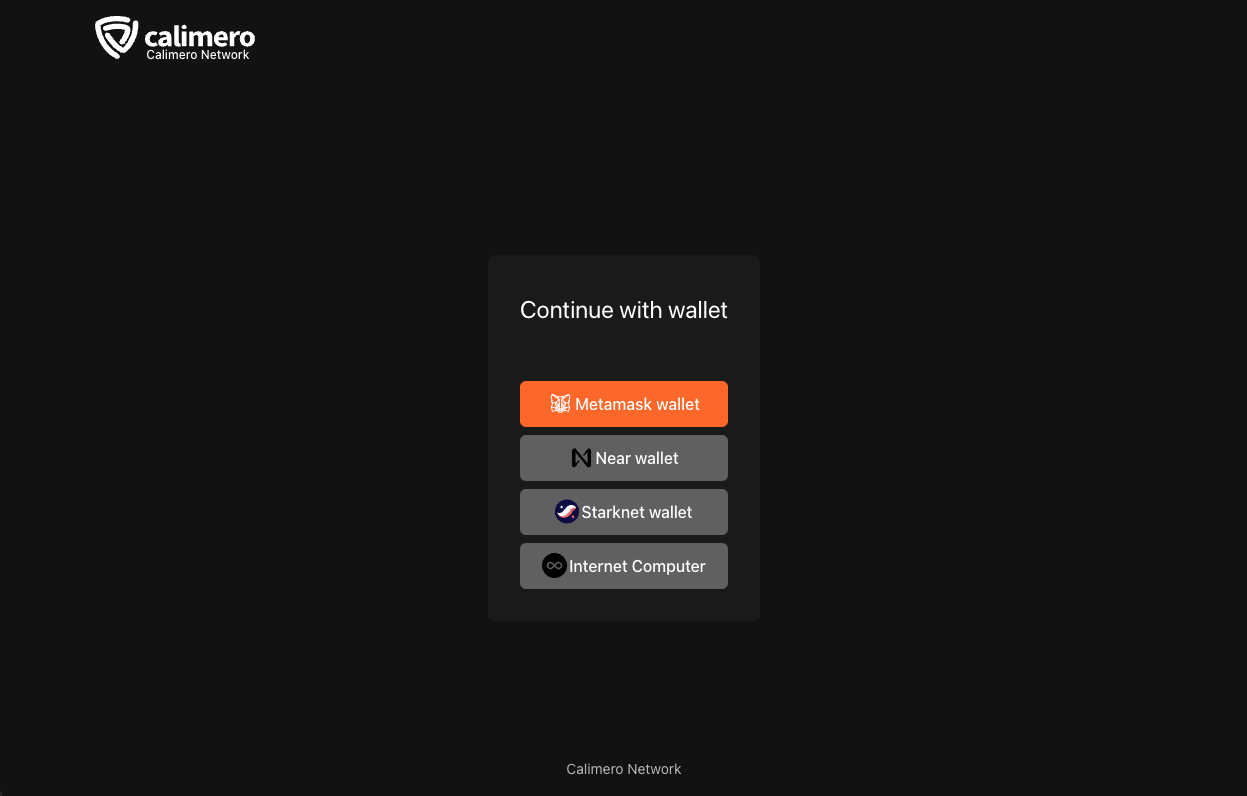
In this example we will be using Metamask with Ethereum Mainnet.
Press "Connect wallet" button to invoke Metamask extension which is needed to continue login process.

When wallet is connected you will be shown the next screen with displayed connected wallet address.
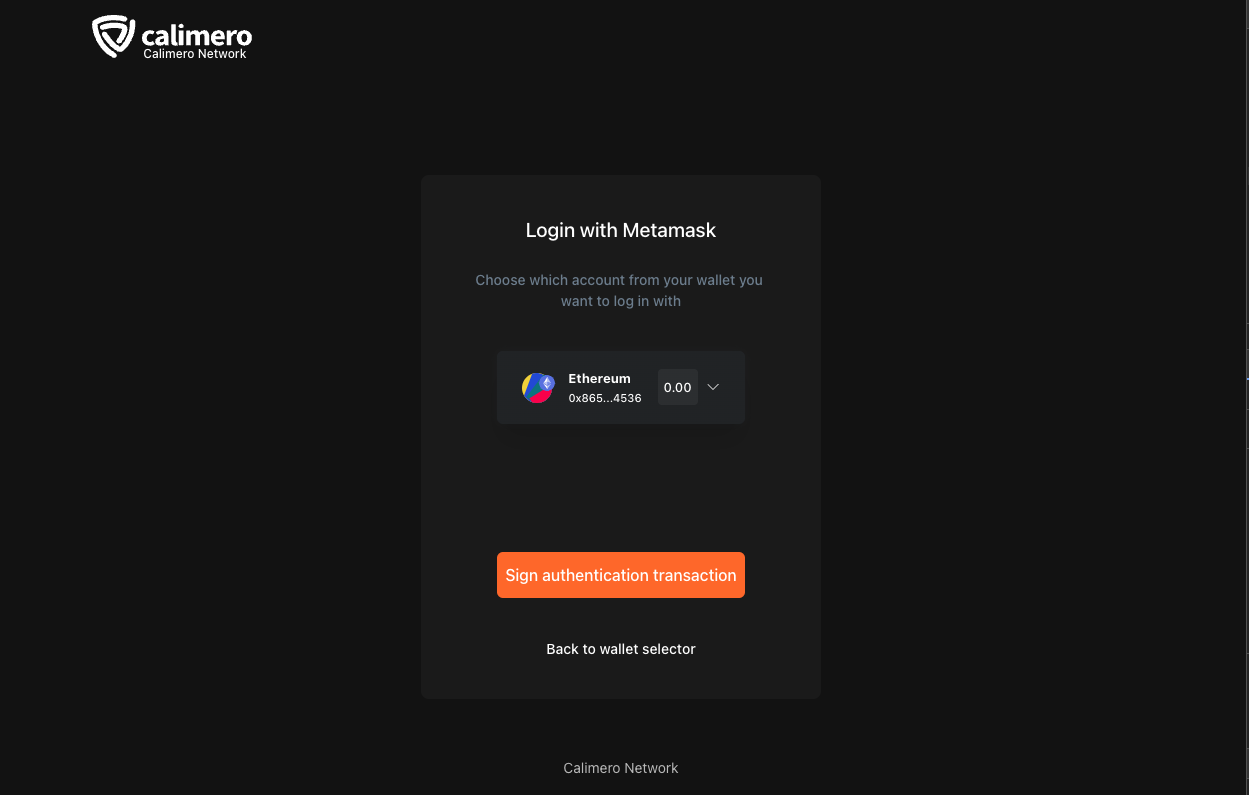
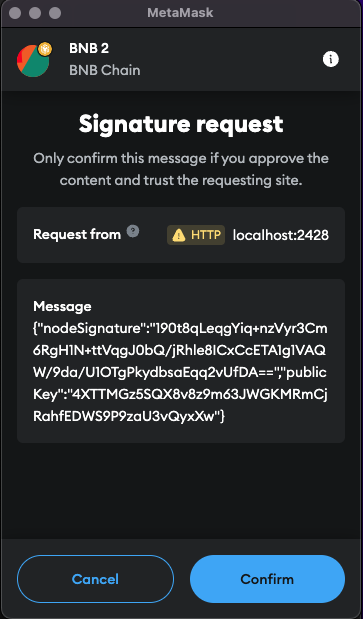
To finish login process press "Sign authentication transaction" which will envoke Metamask to sign transaction.

NOTE: Displayed "BNB 2" text is just a wallet name and this is configued in Metamask. You might have default wallet name "Account" or "Account 1"
On the first login, your selected wallet will be used as a root key to use further functionalities.
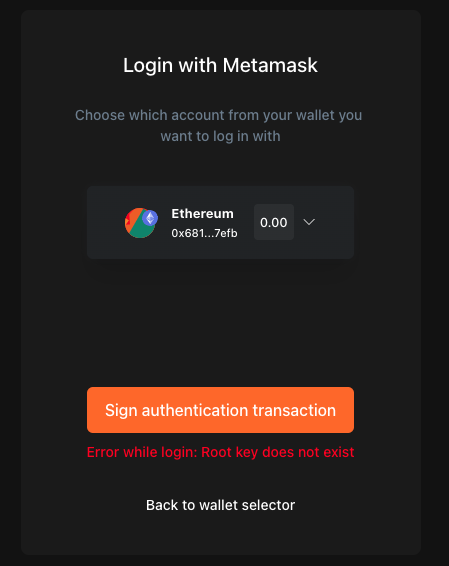
NOTE: If you logout and try to login with different wallet that is not the root key you will get the next error
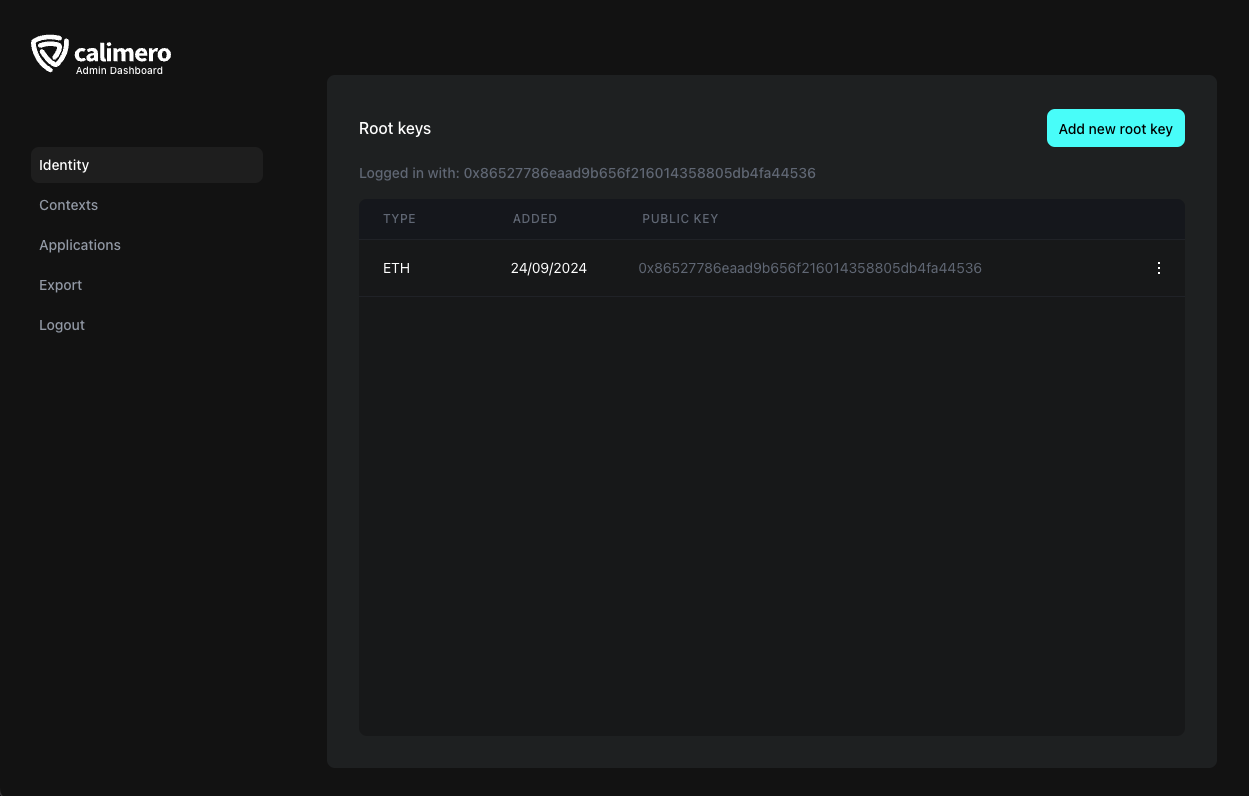
After this request is confimed you will be redirected to the Identity page of the Admin Dashboard where you can see your root key.
Add new root key
To add new root key press the "Add new root key" button and you will go through the same process.
In this example we will be using Metamask again but this time we will use BNB Chain network with different wallet.
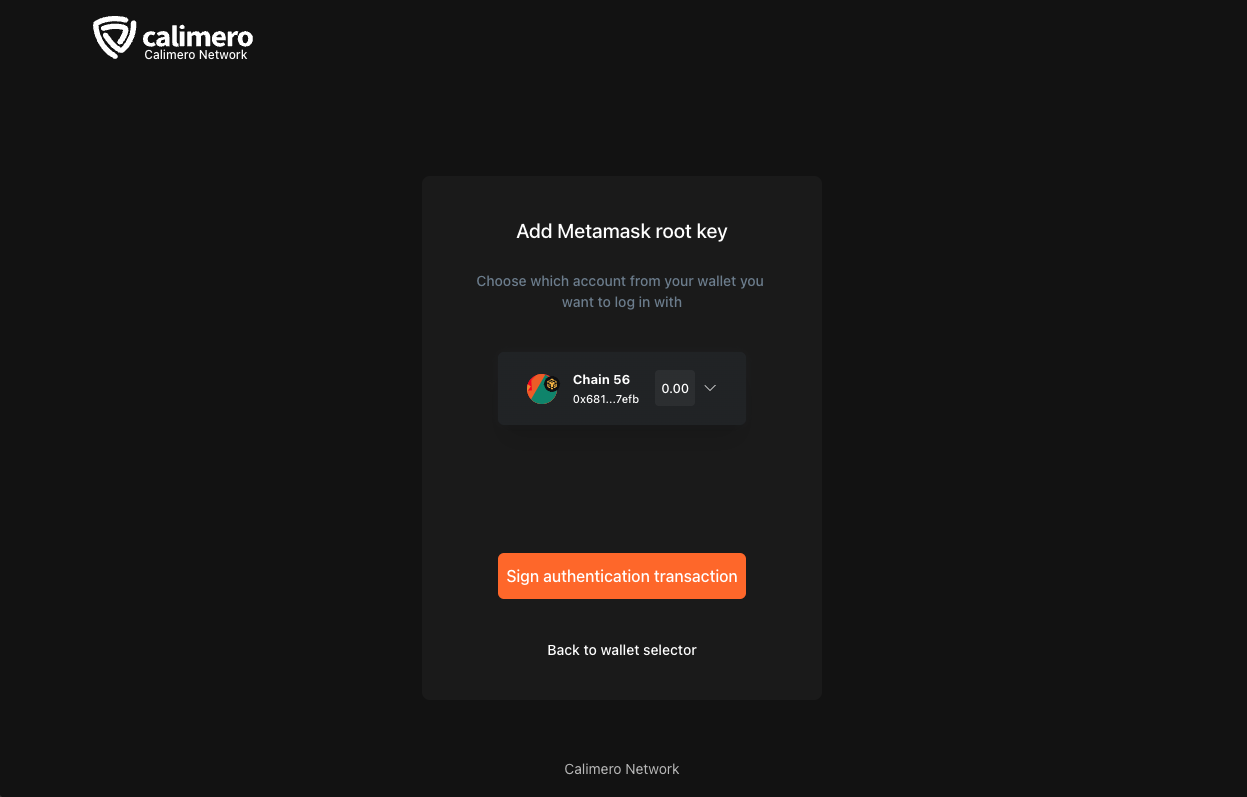
Again, sign the transaction.
You will be redirected back the Identity page and in the list you can see that the new root key with BNB network was added.

Applications
Navigate to "Applications" tab to view table of available, owned or installed applications.

Publish new application
To publish new application click on the "Publish new application" button and you will be redirected to next page.
NOTE: For this step you will need a NEAR blockchain account because the Package Manager application is a smart contract deployed on the NEAR blockchain.
This is needed because from your account you interact with the smart contract deployed on the NEAR blockchain
You can create NEAR blockchain account with MyNEARWallet
Package Manager contains metadata of applications used by the node
Metadata for each application contains:
- Package name
String - Description
String- optional and can be set to "-" - Repository URL
String- optional and can be set to "-" - Path
String- IPFS URL to the application binary, filled automatically when application wasm is uploaded - Version
String- has "X.X.X" format (e.g. 0.0.1 or 1.0.0) - Noted
String- optional and can be set to "-" - Hash
String- Hash value of application wasm, filled automatically when application wasm is uploaded
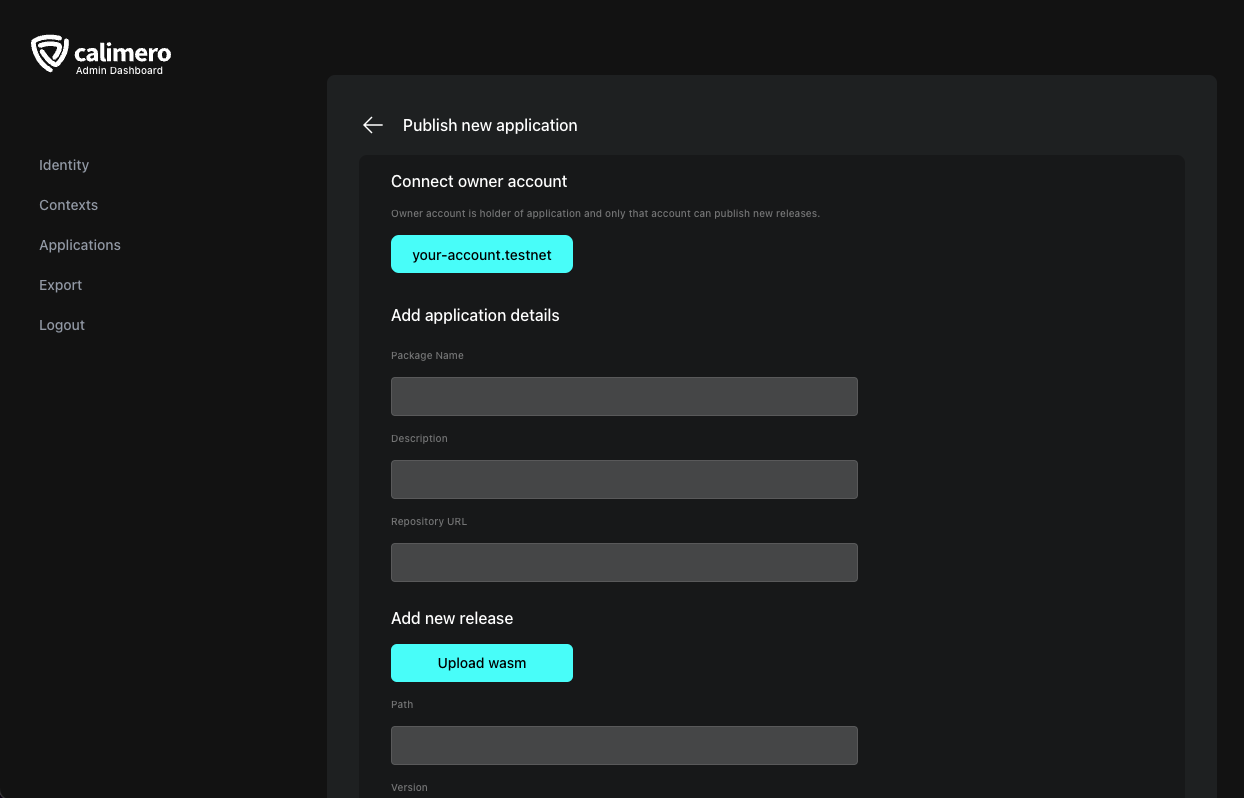
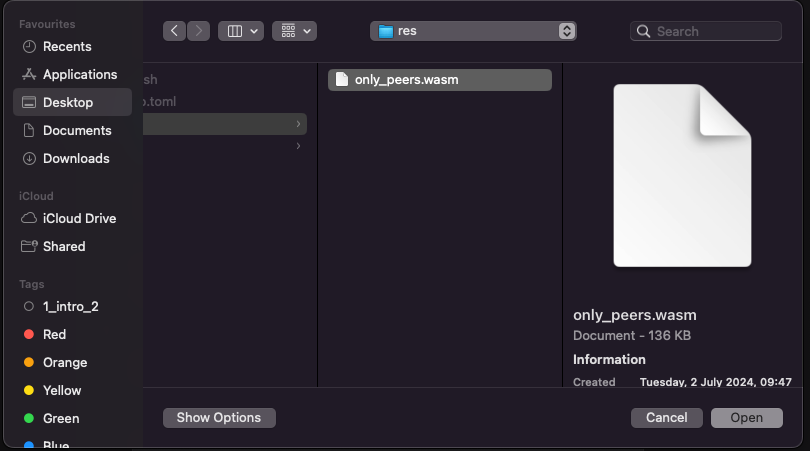
After you fill in the Package name, Description, Repository URL click on the
"Upload wasm" button and select your application .wasm file (e.g. only-peers
application wasm).
After file was uploaded to IPFS, Path and Hash field will be filled automatically and only thing left is to fill in version and notes.
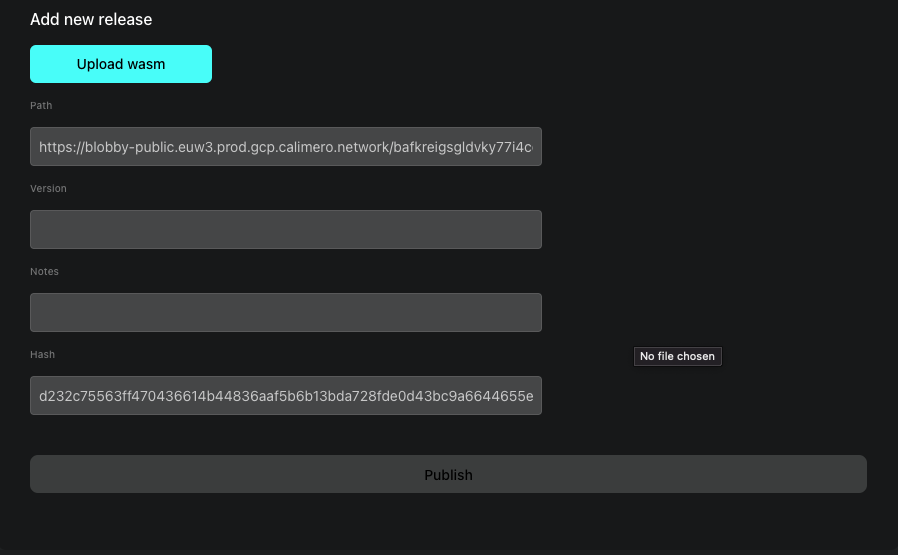
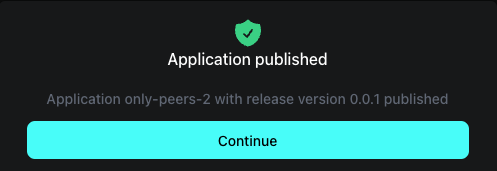
After you click the "Publish" button, application will be published in the Package Manager contract and it will be available in the available applications list.
You will get a status popup message.
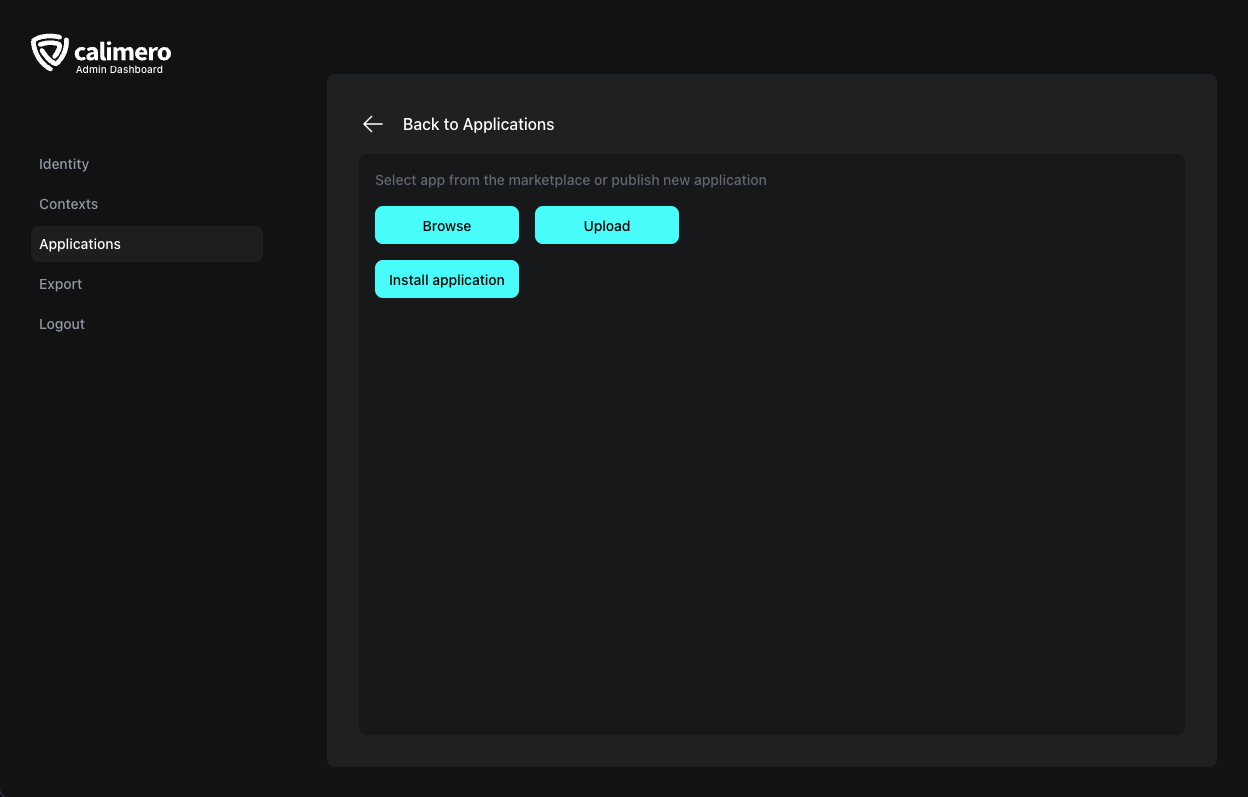
Install available application
To install one of the available application from the Package Manager click on the "install new application" button.
You will be redirected to install page where you can browse available applications or upload a new one.
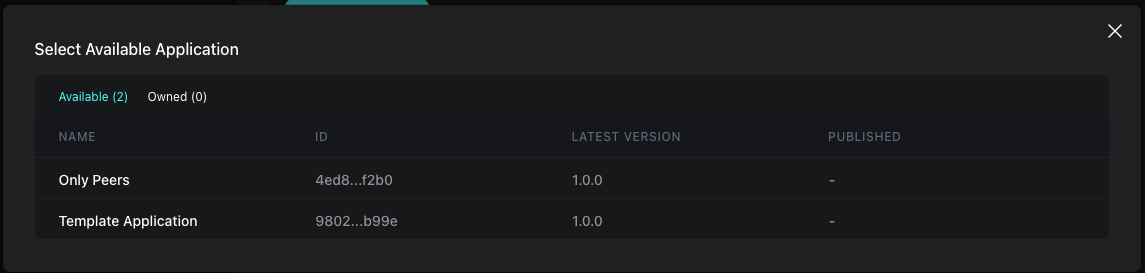
On "Browse" button click you will get a available application list where you can select application you want to install.
On selection the application Metadata will be displayed and you can press "install application" button to install the application.
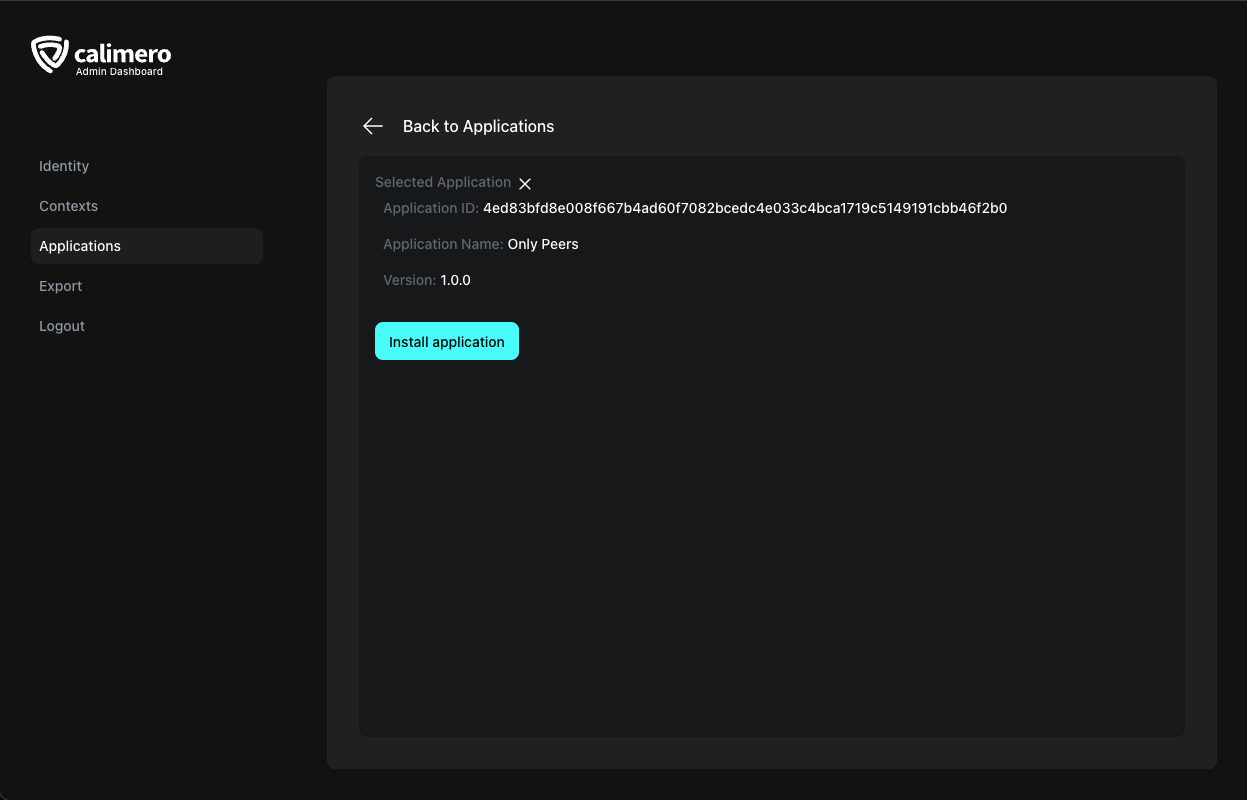
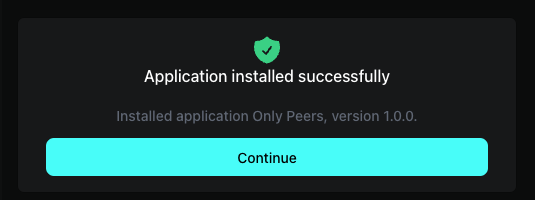
On sucessfull installation you will get status popup.
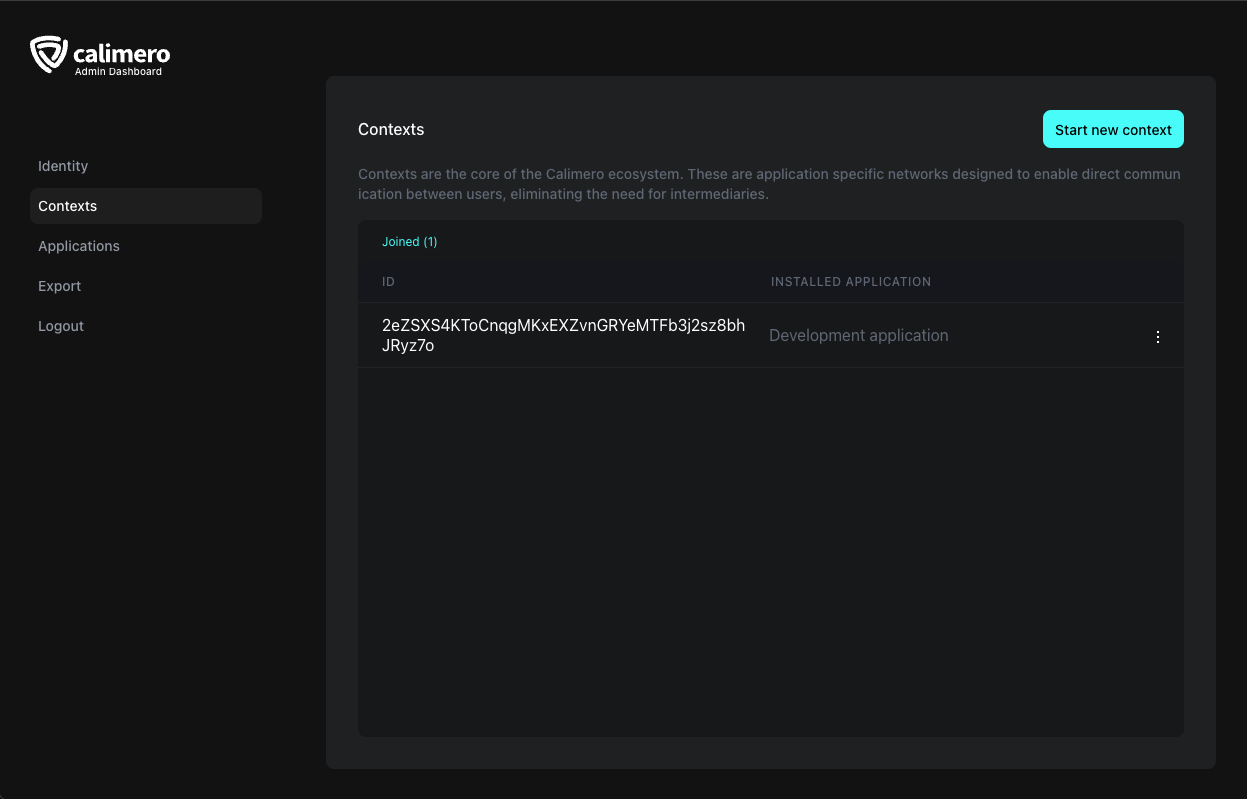
Context
Preview context which you have already joined or invited. You can also create a new context.
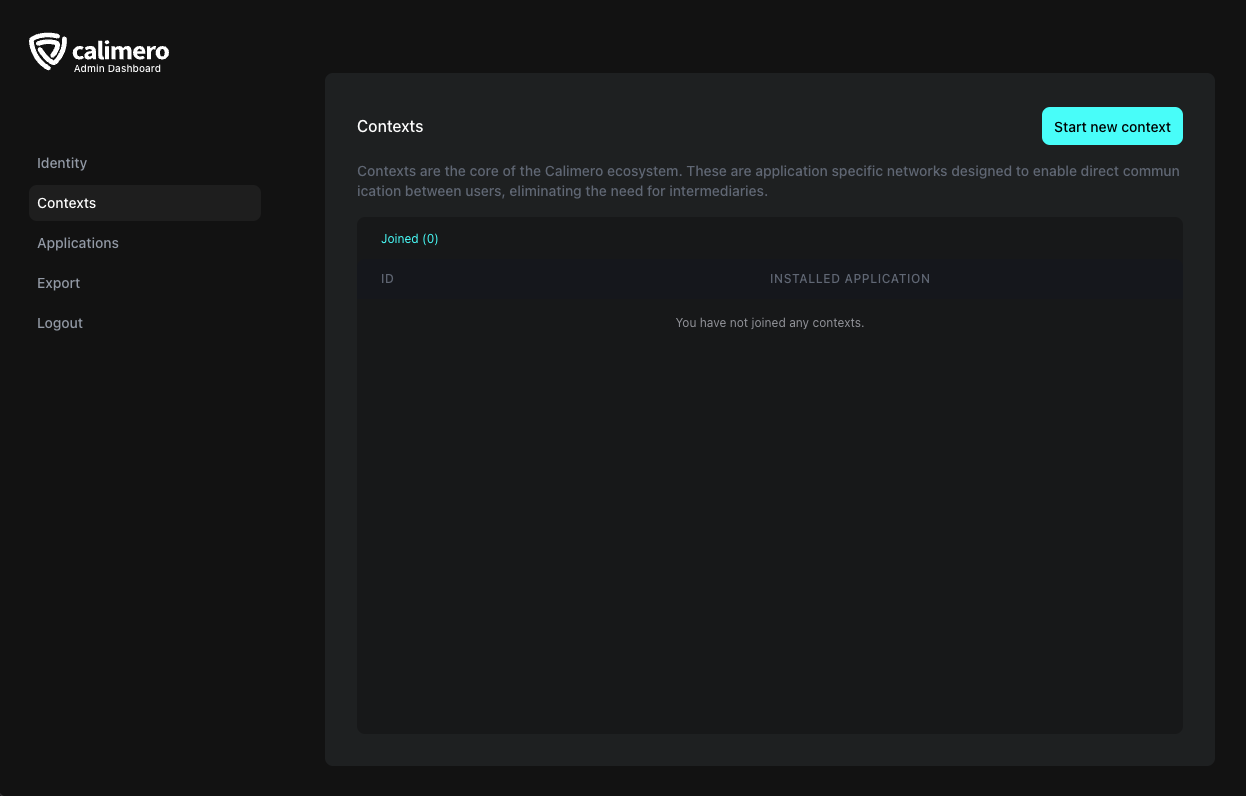
Start new context
To start new context press the "Start new context" button on previous page.
You can select application with which you want to create a new context or you can upload a new application.
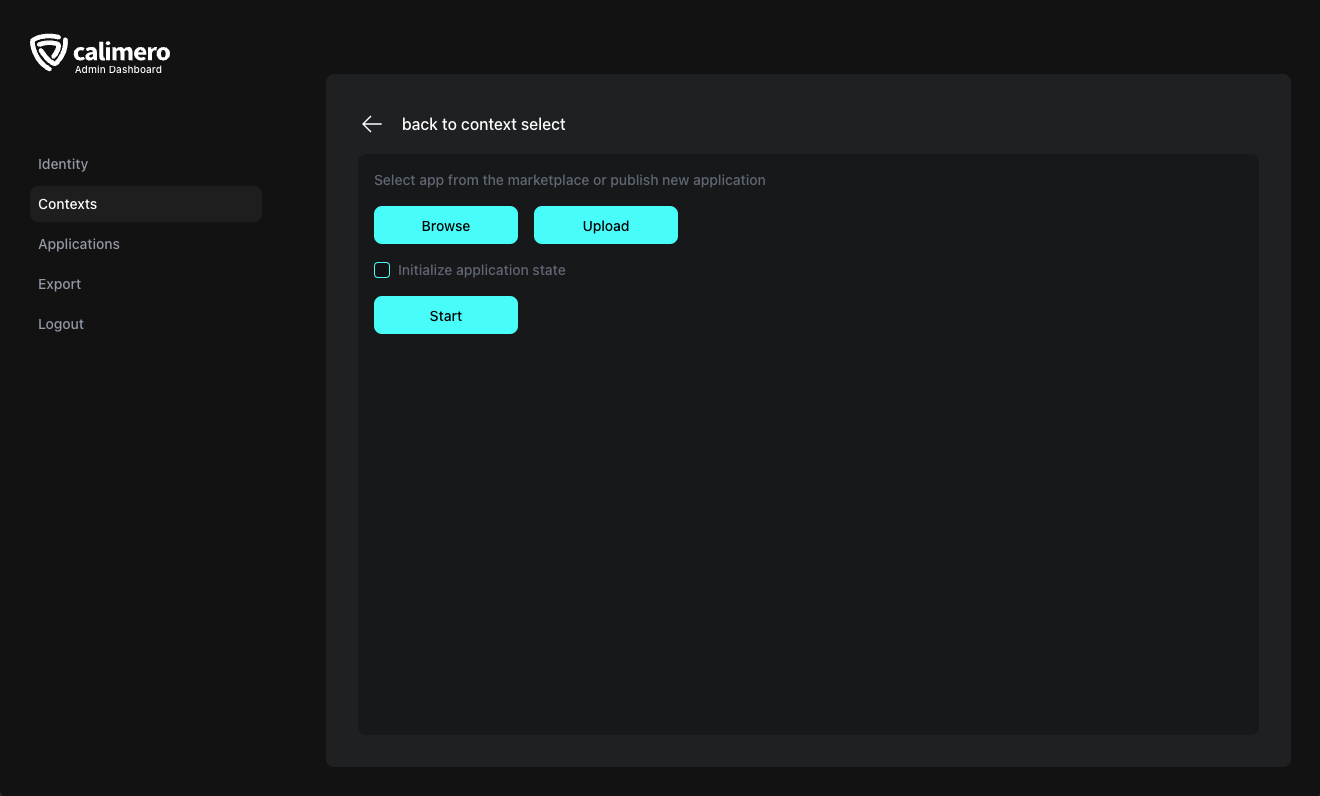
If your application requires initialization parameters, you can select the 'Initialize application state' option during startup.
NOTE: To understand this lets take two examples.
- Consider a JavaScript class MyClass. In some cases, you can create an instance using
new MyClass()if there are no initialization parameters required.- However, if your class requires specific parameters for initialization, you need to pass them like this:
new MyClass({ application_name: name }). This is similar to your WASM application's requirement for initialization parameters during its startup process.
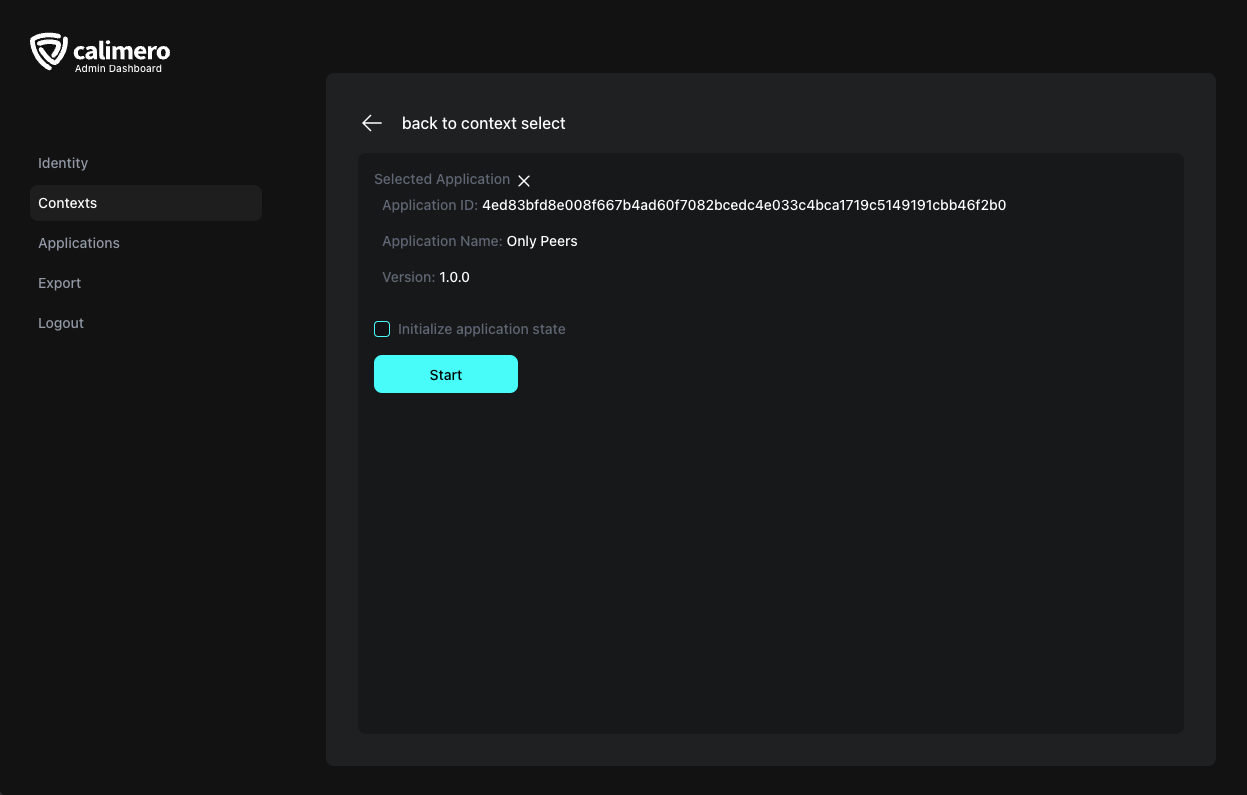
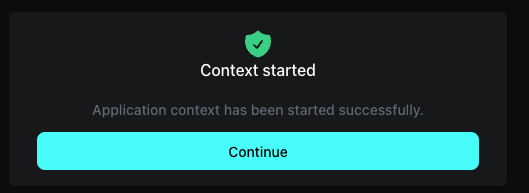
On button "Start" click the new context will be created and you will get status popup.
You can now see created context in the context list.
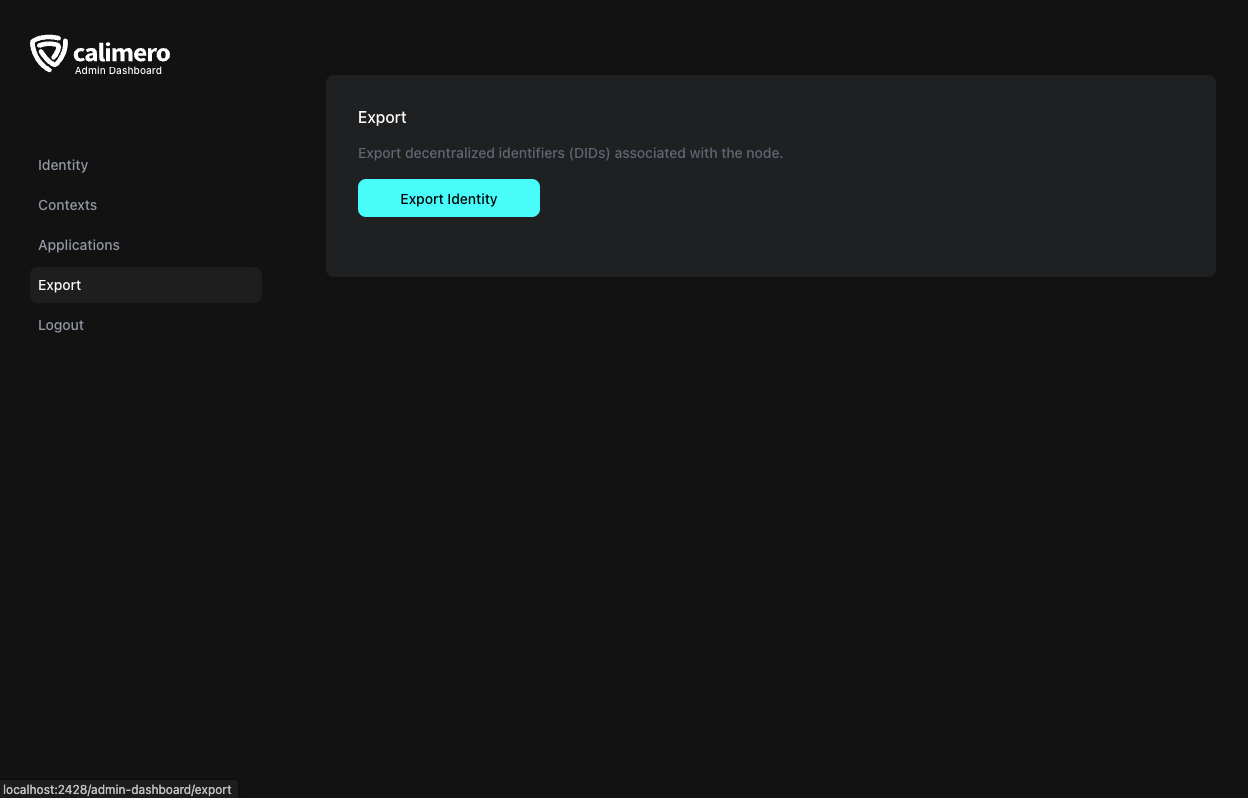
Export
Allows you to export you identity on current device and import it on new device.