Create Context
Create a context using the Admin Dashboard
- Navigate to the "Contexts" tab and click the "Start New Context" button.
- Use the "Browse" button to select an application from the list.
- Choose the "Template Application" option.
- Press "Start" to initiate the context creation process with the selected application.
Visit Admin Dashboard Page to view detailed instructions with images.
After the context is created, you will be redirected to the context dashboard. Keep this page open as you will need the Context ID later.
Create context using interactive CLI
After you starting the node following instructions, interactive CLI will be available within the same terminal.
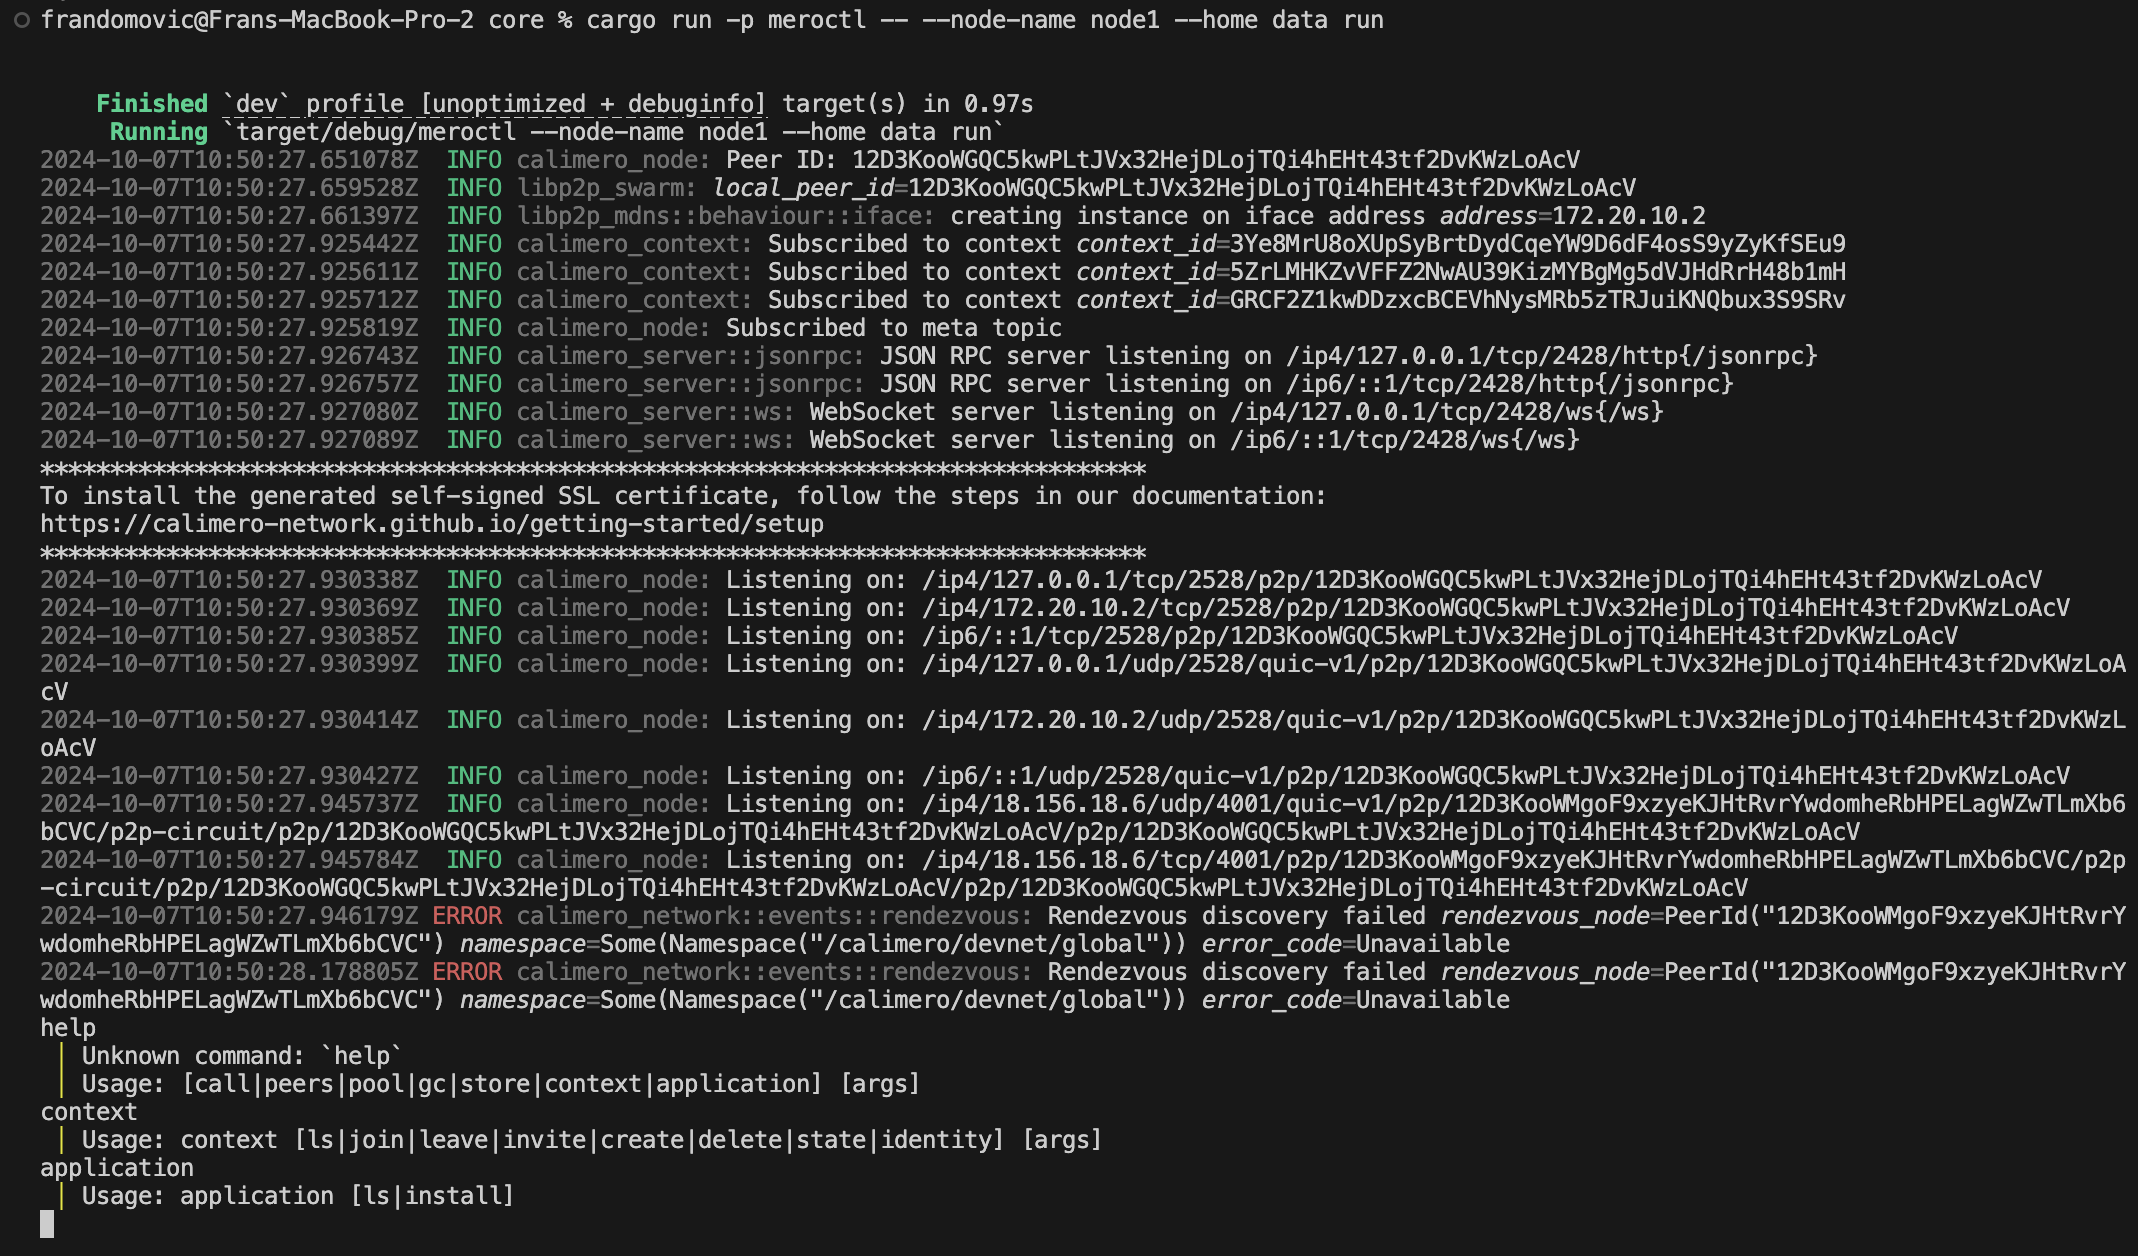
NOTE: You can see available commands in terminal: call, peers, pool, gc, context, application. In this example we will be using commands for
contextandapplication.
Step 1: Install the Application
Run the following command to install the application:
application install url {url} {metadata}
NOTE: metadata example:
'{"contractAppId": "<application_id>"}'
You can find the application URL and contractAppId by opening Application
Details from Applications section of the Admin Dashboard.
You can also install an app that you have available locally with file:
application install file {path/to/file}
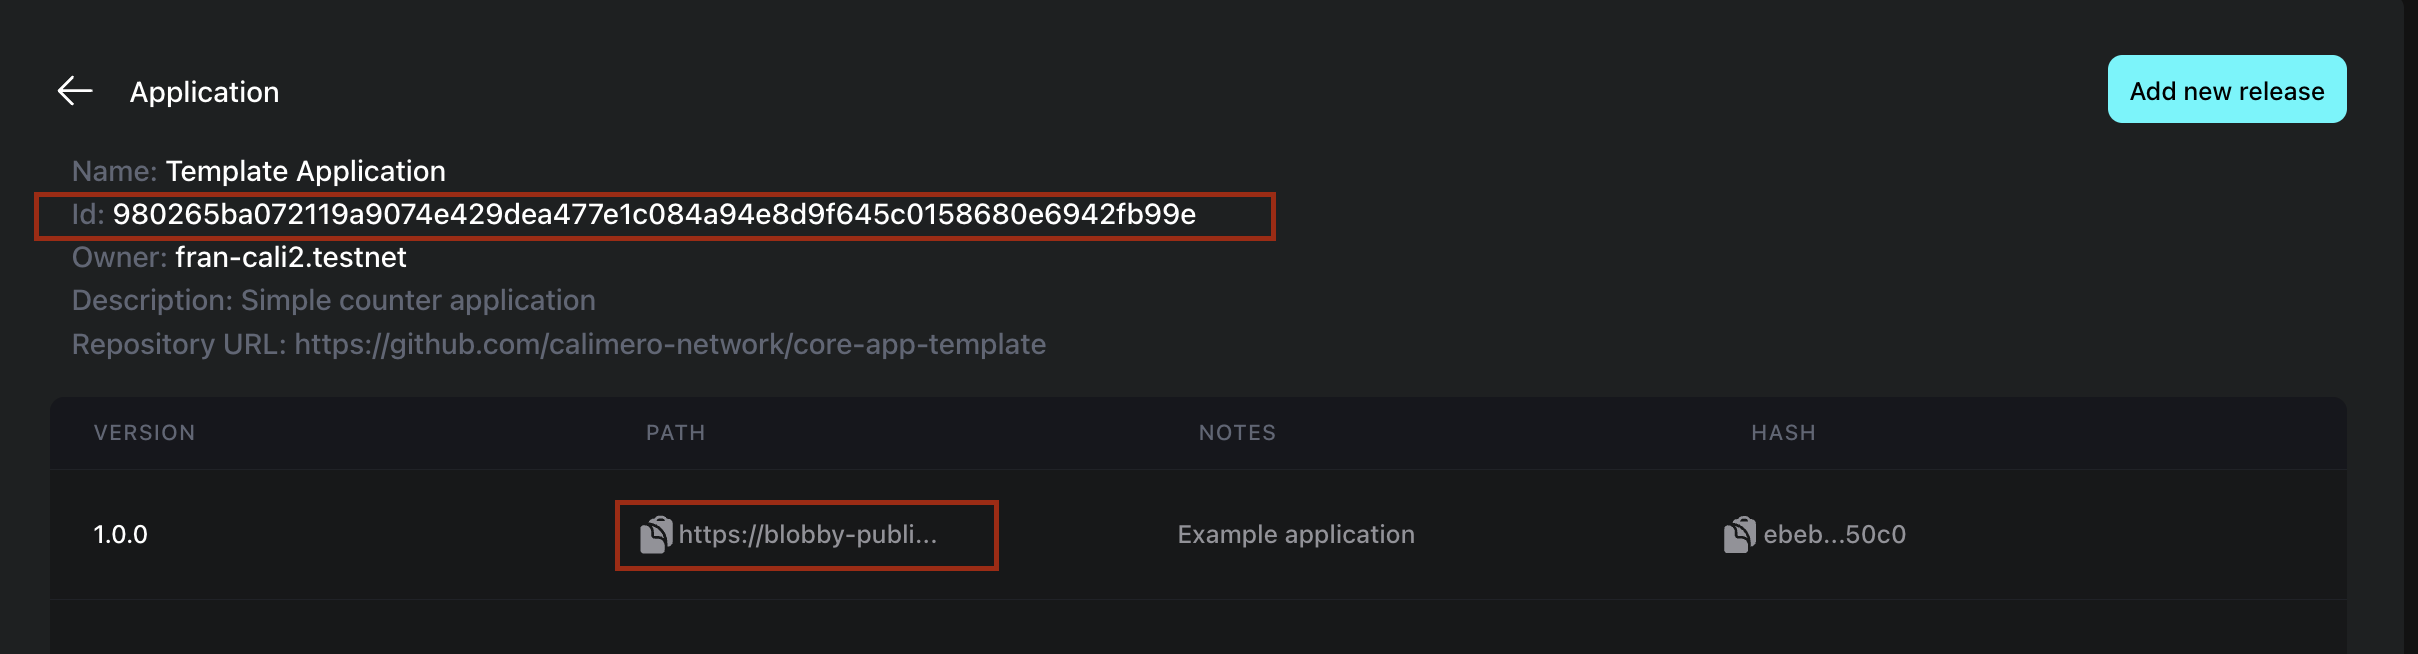
contractApplicationId is the id of application stored in the contract. Value
is optional but if provided, it enables Admin Dashboard to extract and display
the application metadata.
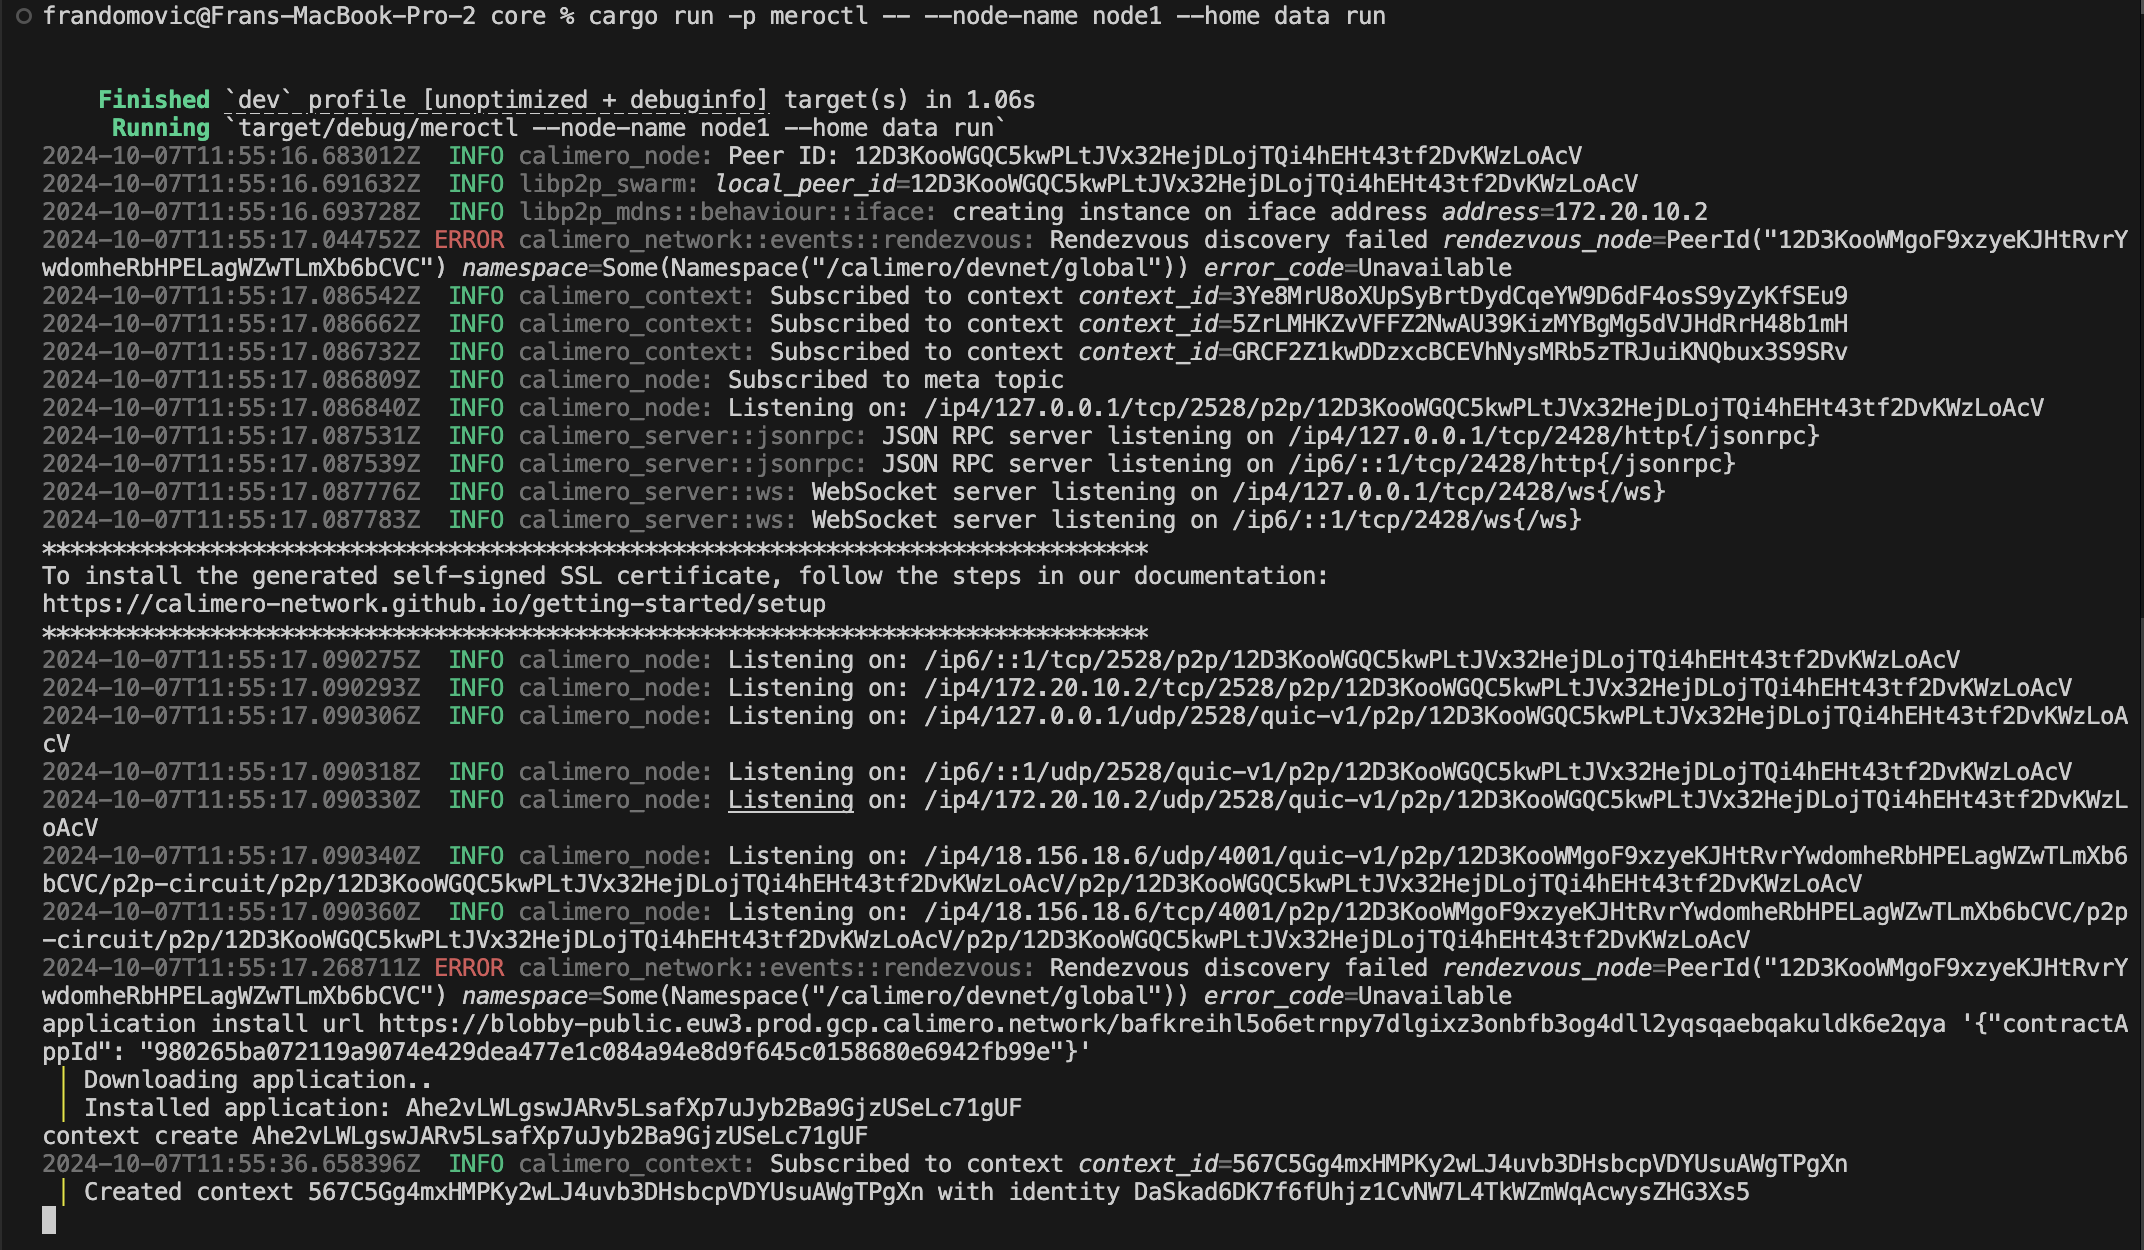
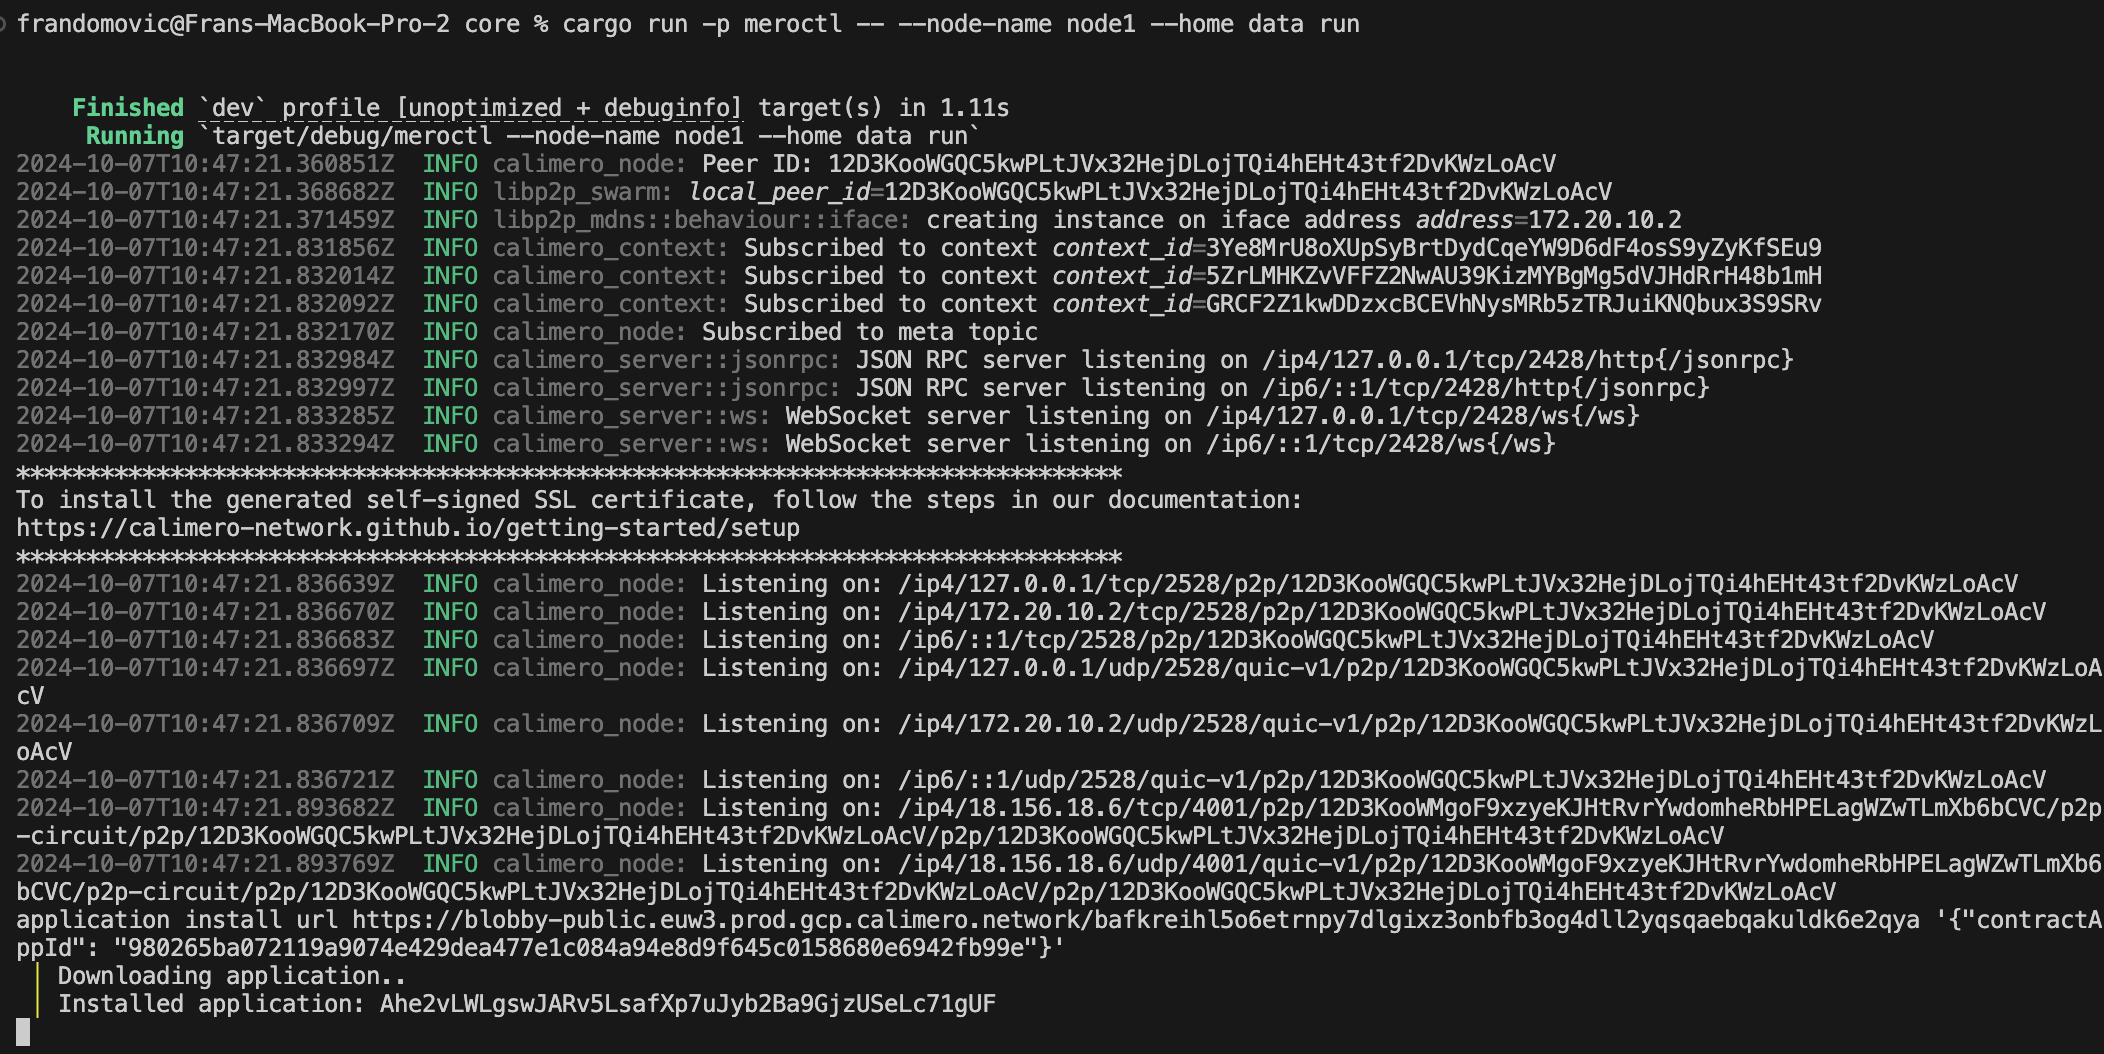
application install url https://blobby-public.euw3.prod.gcp.calimero.network/bafkreihl5o6etrnpy7dlgixz3onbfb3og4dll2yqsqaebqakuldk6e2qya '{"contractAppId": "980265ba072119a9074e429dea477e1c084a94e8d9f645c0158680e6942fb99e"}'
| Downloading application..
│ Installed application: Ahe2vLWLgswJARv5LsafXp7uJyb2Ba9GjzUSeLc71gUF
Step 2: Create a New Context
Conext can be created from the Admin Dashboard Page or with interactive CLI.
After the application is successfully installed, you can create a new context with the installed application using this command:
context create {applicationId}
context create Ahe2vLWLgswJARv5LsafXp7uJyb2Ba9GjzUSeLc71gUF
2024-10-07T11:55:36.658396Z  INFO calimero_context: Subscribed to context context_id=567C5Gg4mxHMPKy2wLJ4uvb3DHsbcpVDYUsuAWgTPgXn
Created context 567C5Gg4mxHMPKy2wLJ4uvb3DHsbcpVDYUsuAWgTPgXn with
identity DaSkad6DK7f6fUhjz1CvNW7L4TkWZmWqAcwysZHG3Xs5