Building with Stellar
Step-by-Step Guide to Building an Application for Calimero with Stellar
This tutorial will cover the following topics:
-
Smart contract overview - Overview of the smart contracts and their functionality.
-
Configuring Nodes - Setting and configuring nodes, installing demo application, creating context and inviting nodes into the context.
-
Installing a Blockchain Demo Application - Setup demo application that contains all functionalities for interaction with smart contracts.
-
Creating a Proposal - Creating a proposal to execute cross-contract call to "Greet" smart contract deployed in step 3.
For easier guidance, we have named each terminal block by their purpose.
Requirements
To follow this tutorial, you'll need the following:
- Calimero Core - Installation instructions - Instructions
- Demo Blockchain Integrations - Repository
You also need following tools:
- Cargo: Version
1.86.0-nightlyused for tutorial - url - Pnpm: Version
9.6.0used for tutorial - url - Stellar CLI - Installation instructions - Instructions
Smart contract overview
Contracts overview
Both contracts are written in Rust, you can find their implementations in the following repositories:
Context and Proxy Contract
Context contract
Context contract is deployed on Stellar testnet and implemented into Calimero. It is used to create and manage contexts and their members.
More information about context contract can be found here.
Proxy contract
With each context creation a proxy contract for that context is deployed. Proxy contract is used to handle blockchain operations such as cross-contract calls and transfers as well as storing variables.
More information about proxy contract can be found here.
Setting up and configuring nodes
By deafult proposal needs 3 approvals before it is executed so we will setup 3 nodes.
- Initialize and start 3 nodes
- Install blockchain demo application
- Create context for blockchain demo application
- Invite all nodes in the same context
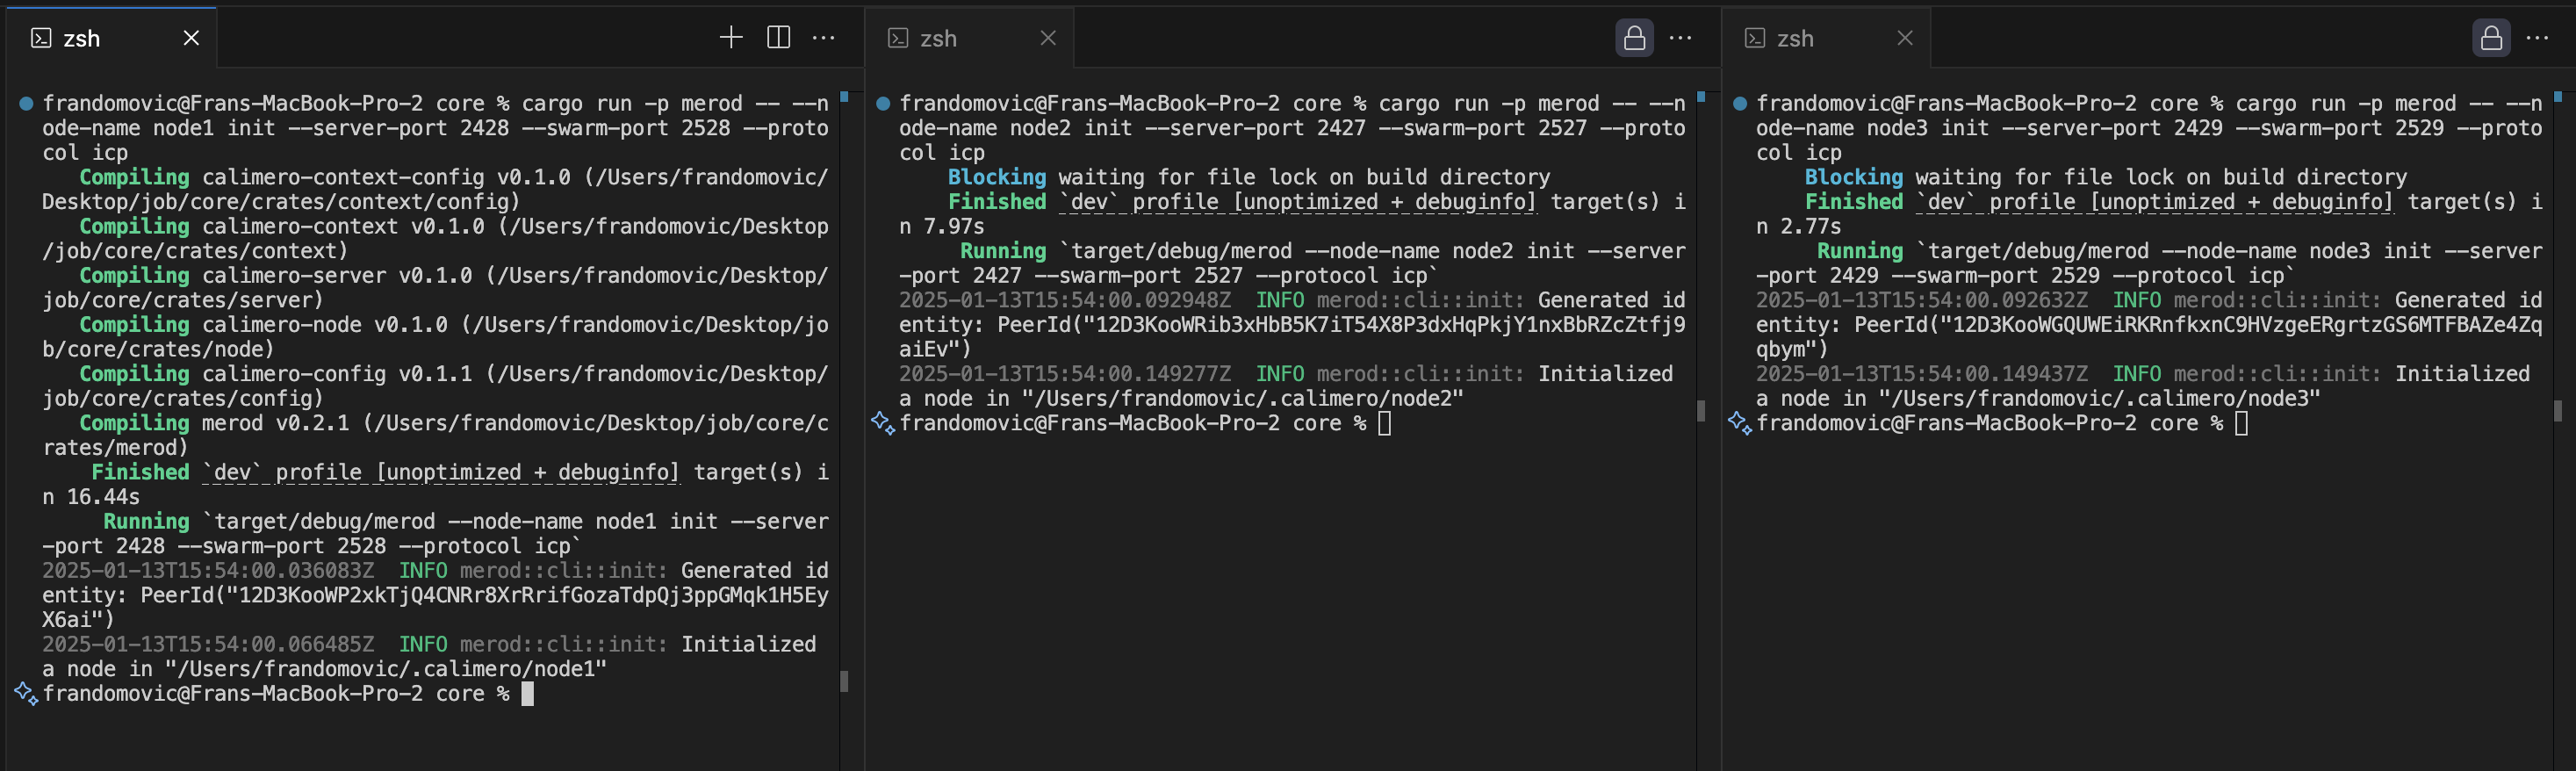
Initialize and Start Nodes
Open 3 terminals side by side.
merod --node-name node1 init --server-port 2427 --swarm-port 2527
merod --node-name node2 init --server-port 2428 --swarm-port 2528
merod --node-name node3 init --server-port 2429 --swarm-port 2529
The output should look like this:
You can verify nodes initialization files by looking into ~/.calimero folder.
In config.toml file you can see default configuration:
[context.config.stellar]
signer = "self"
protocol = "stellar"
network = "testnet"
contract_id = <CONFIG_CONTRACT_ID>
If you use self for signer then you also need to change public and secret
key.
[context.config.signer.self.stellar.testnet]
rpc_url = "https://soroban-testnet.stellar.org/"
public_key = <YOUR_PUBLIC_KEY>
secret_key = <YOUR_SECRET_KEY>
The values auto-generated only represent the format needed for self signing feature and are not real Stellar accounts. To create your own Stellar account with CLI follow the Stellar Docs
If signer is changed to signer = "relayer" you don't need to changed anything
as relayer will handle all the blockchain operations.
More on node initialization can be found here.
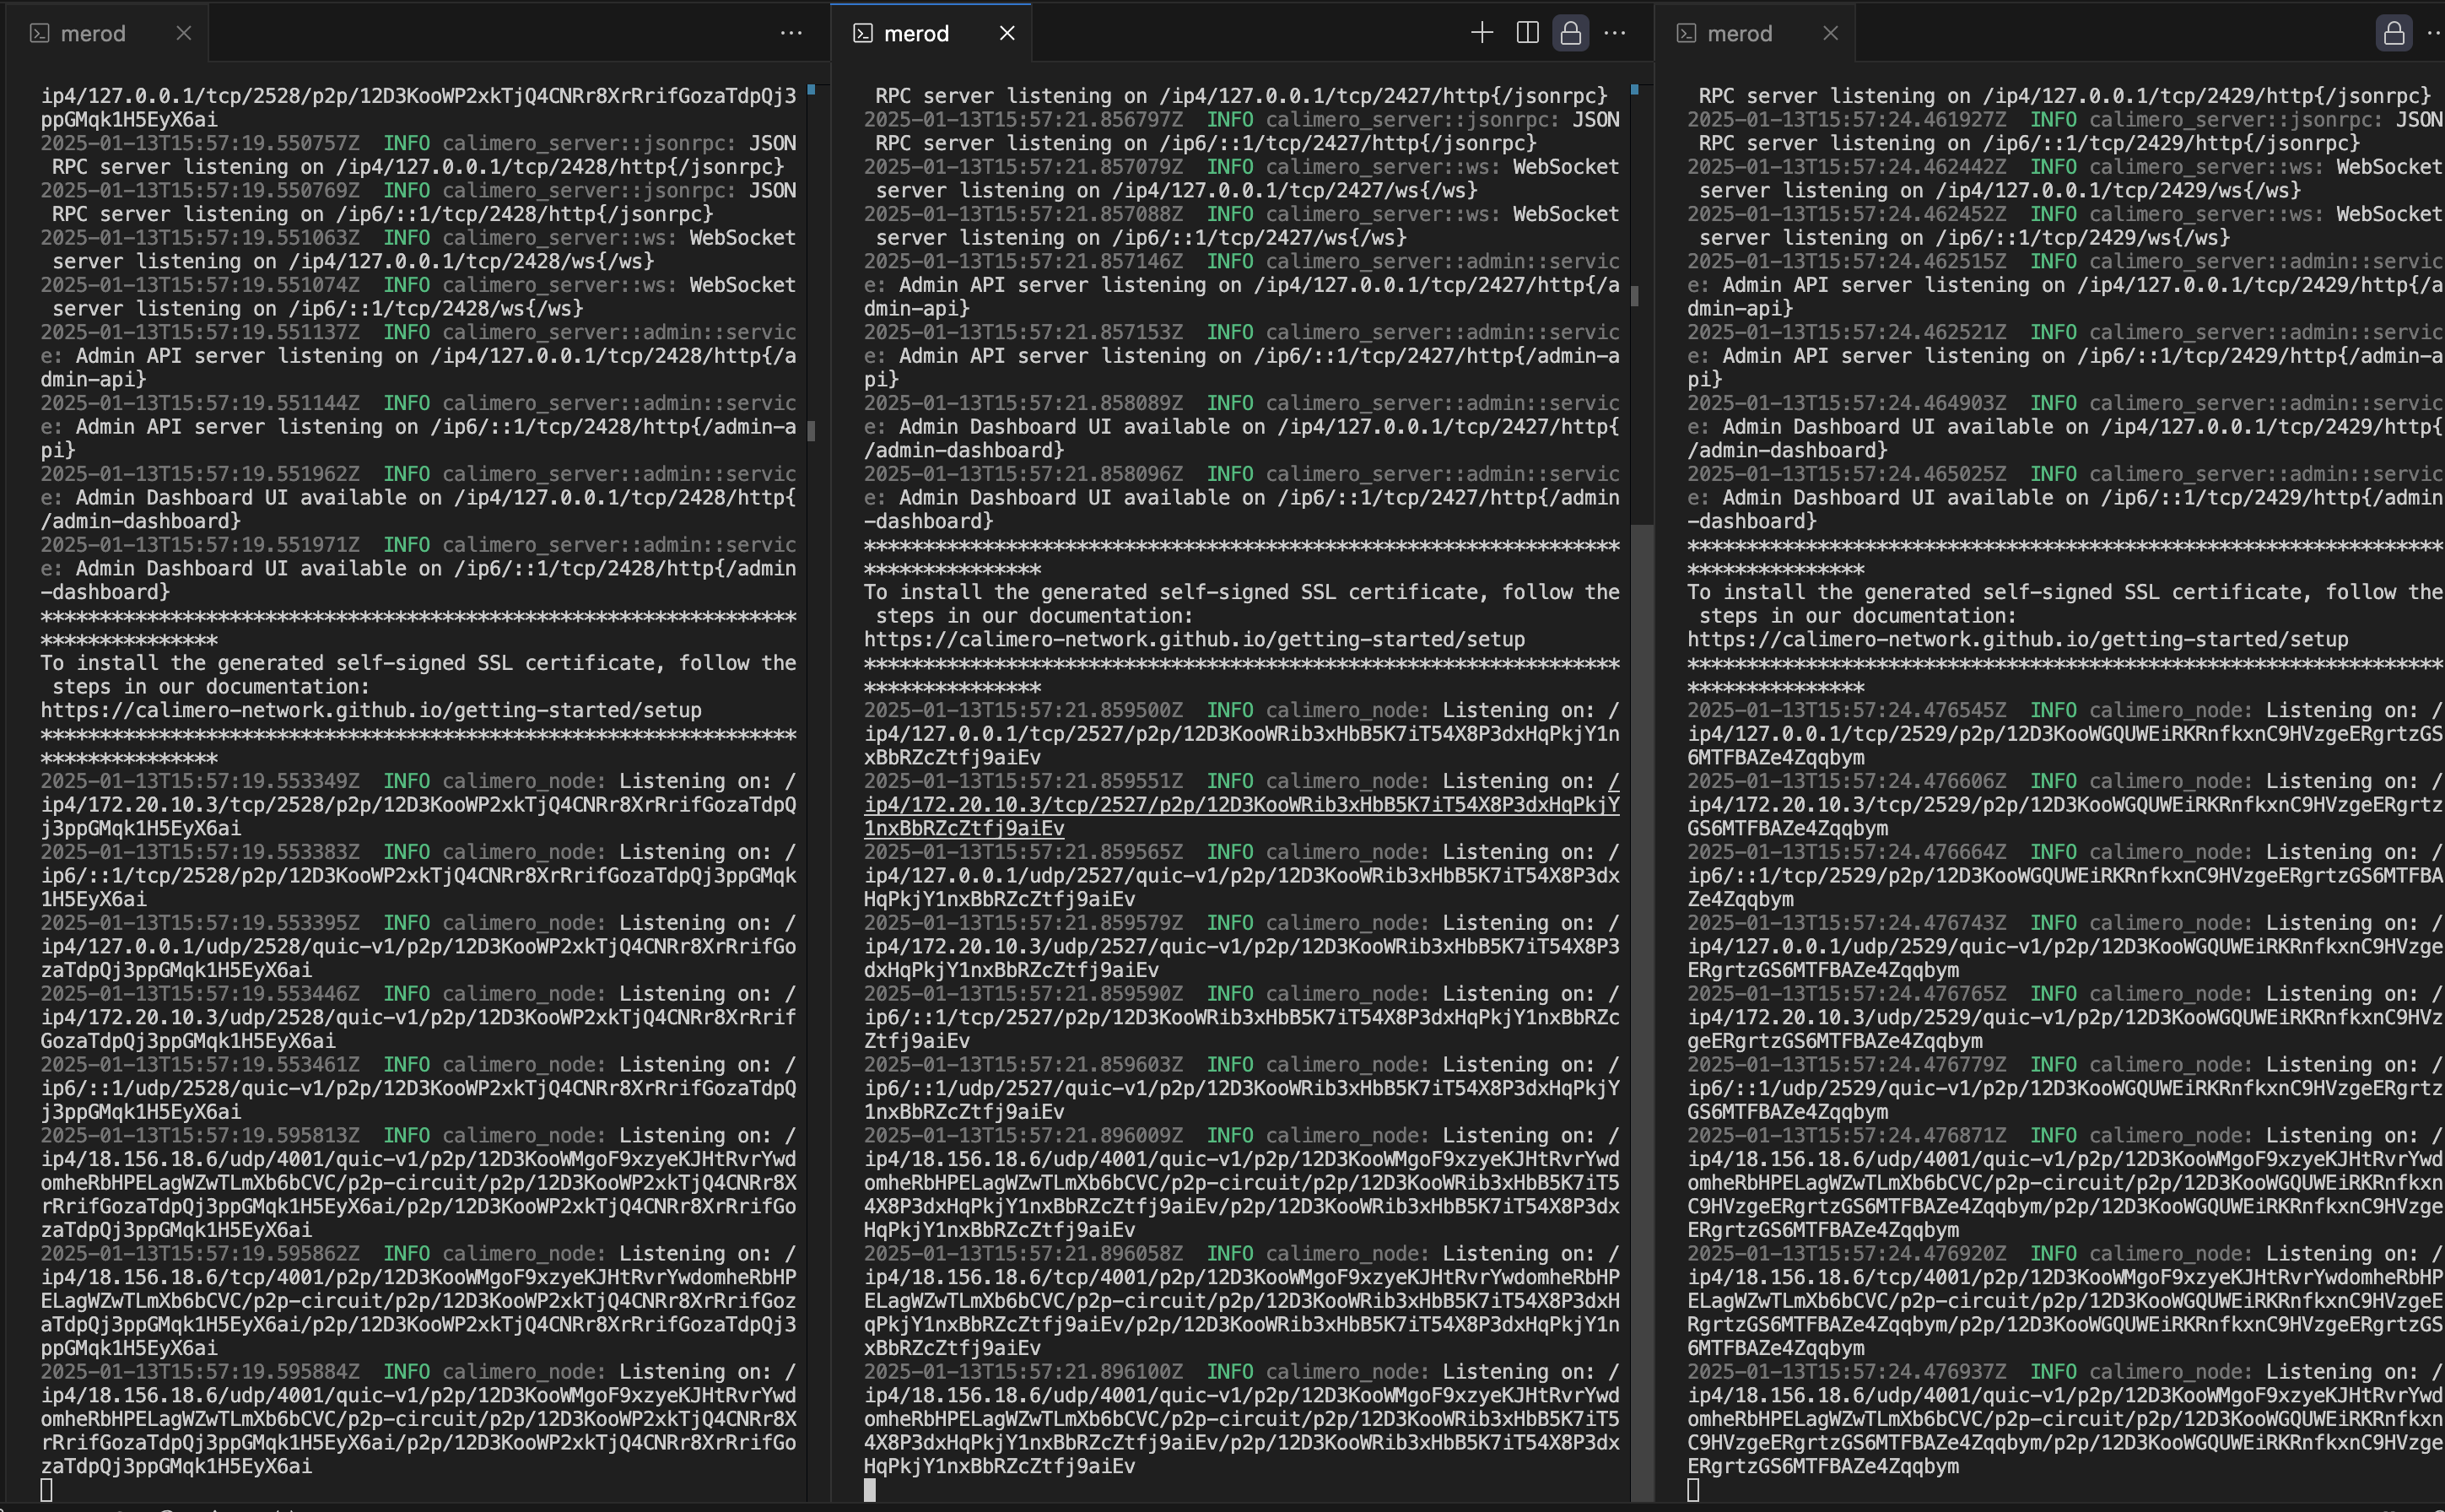
Now we are going to start the nodes with the commands:
merod --node-name node1 run
merod --node-name node2 run
merod --node-name node3 run
After running the nodes you should see the similar to this one:
Install application
Inside the node1 terminal we are going to install blockchain demo application.
- Clone the Demo Blockchain Integrations repository.
- Navigate to the
logicdirectory. - Build the application using the
build.shscript, script will compile wasm file in /res directory. - Copy the
blockchain.wasmfile path
Applications are installed with the following command:
application install file <PATH_TO_blockchain.wasm_FILE>
>Installed application: <APPLICATION_ID>
After installing the application we can create context:
context create <APPLICATION_ID> --protocol stellar
>Created context <CONTEXT_ID> with identity <CONTEXT_IDENTITY>
After creating context we need to add node2 and node3 to it.
To be able to do that we need to create identities for node2 and node3
with whom they will join to the created context.
identity new
>> Private key: <PRIVATE_KEY>
>> Public key: <PUBLIC_KEY>
identity new
>> Private key: <PRIVATE_KEY>
>> Public key: <PUBLIC_KEY>
The output should look like this:

After creating identities we can invite node2 and node3 to join the created context.
context invite <CONTEXT_ID> <PUBLIC_KEY_OF_NODE2> --as <CONTEXT_IDENTITY>
>> Invitation payload: <INVITATION_PAYLOAD>
This will generate a invitation payload which can node2 use to join the context. Copy the invitation payload and do the following command in node2 terminal:
context join <PRIVATE_KEY_OF_NODE2> <INVITATION_PAYLOAD>
>> Joined context <CONTEXT_ID>
Repeat the same steps for Node3.
context invite <CONTEXT_ID> <PUBLIC_KEY_OF_NODE3> --as <CONTEXT_IDENTITY>
context join <PRIVATE_KEY_OF_NODE3> <INVITATION_PAYLOAD>
>> Joined context <CONTEXT_ID>
The output in terminal after inviting and joining nodes should look like this:
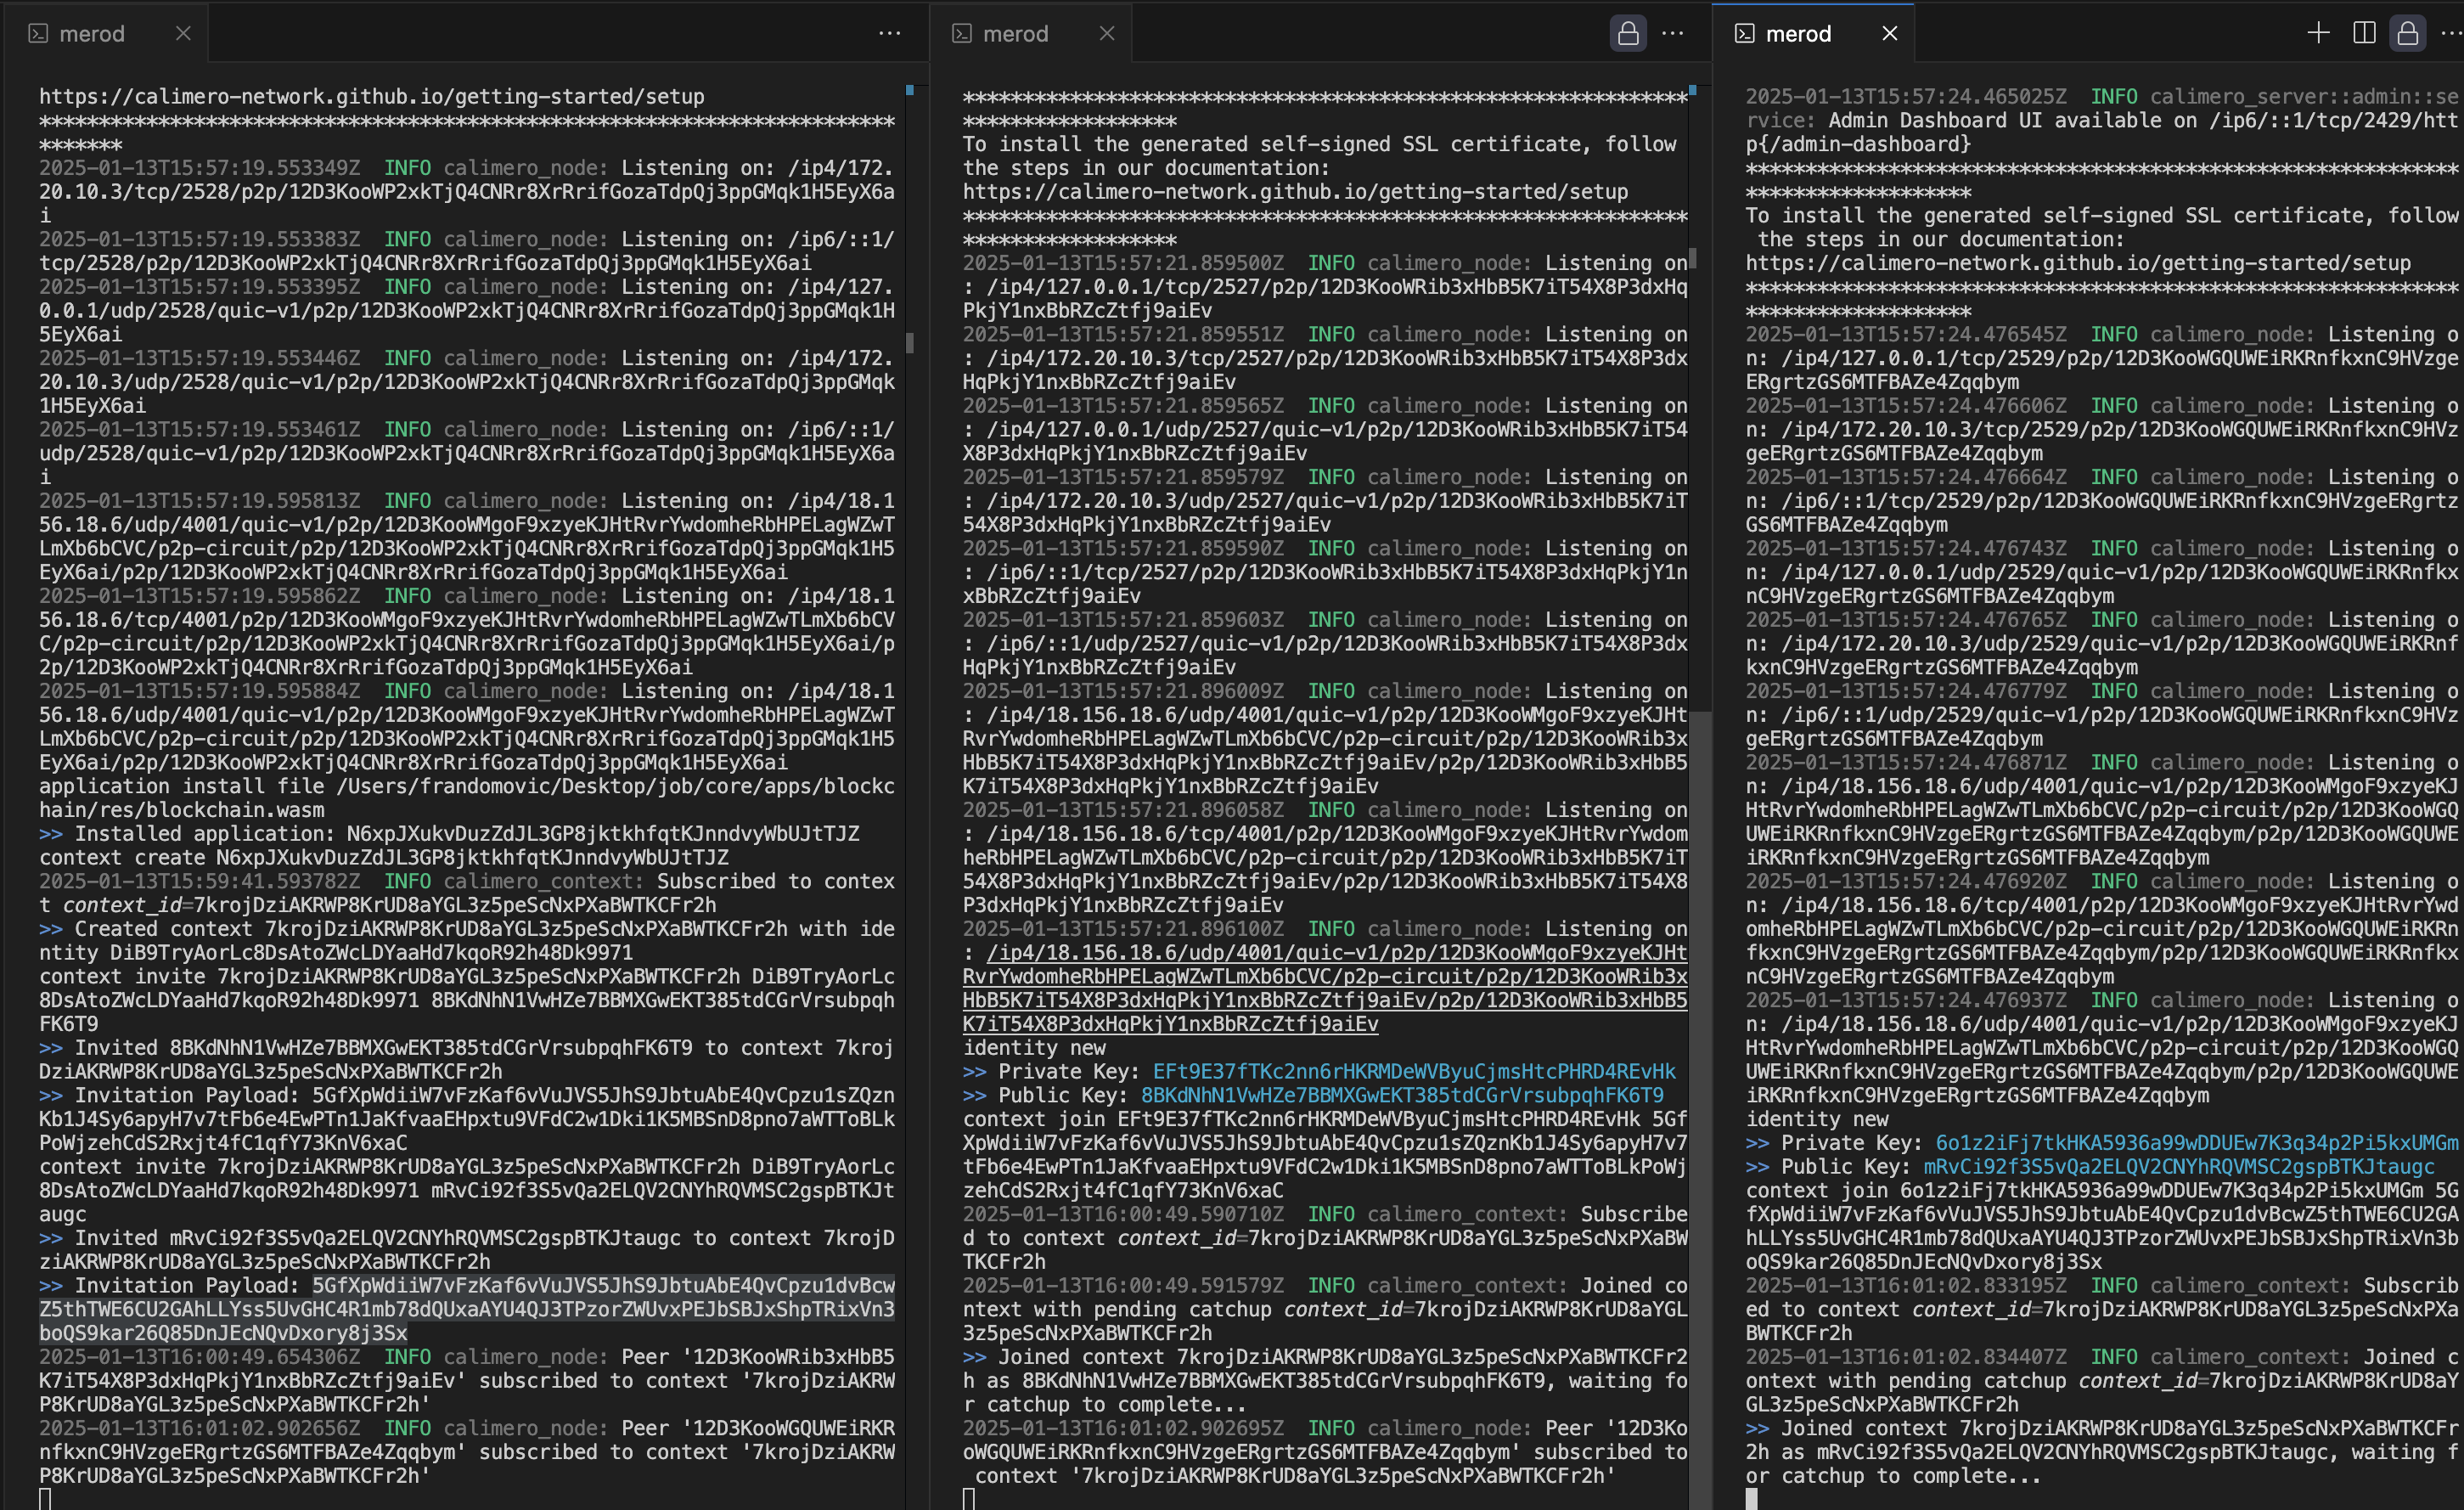
More on invitations and joining the context can be found here
Lastly we can check if all nodes are connected in context with:
context ls
> <CONTEXT_ID>
identity ls <CONTEXT_ID>
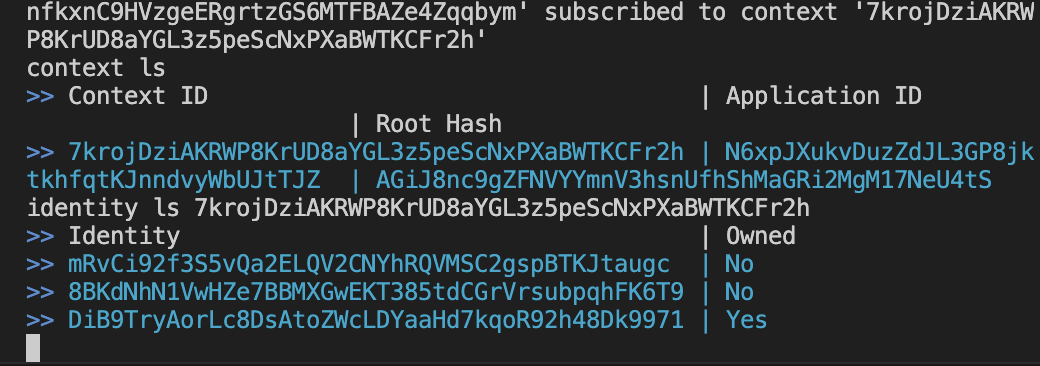
We can see there are 3 nodes connected in context.
Fund Proxy Contract
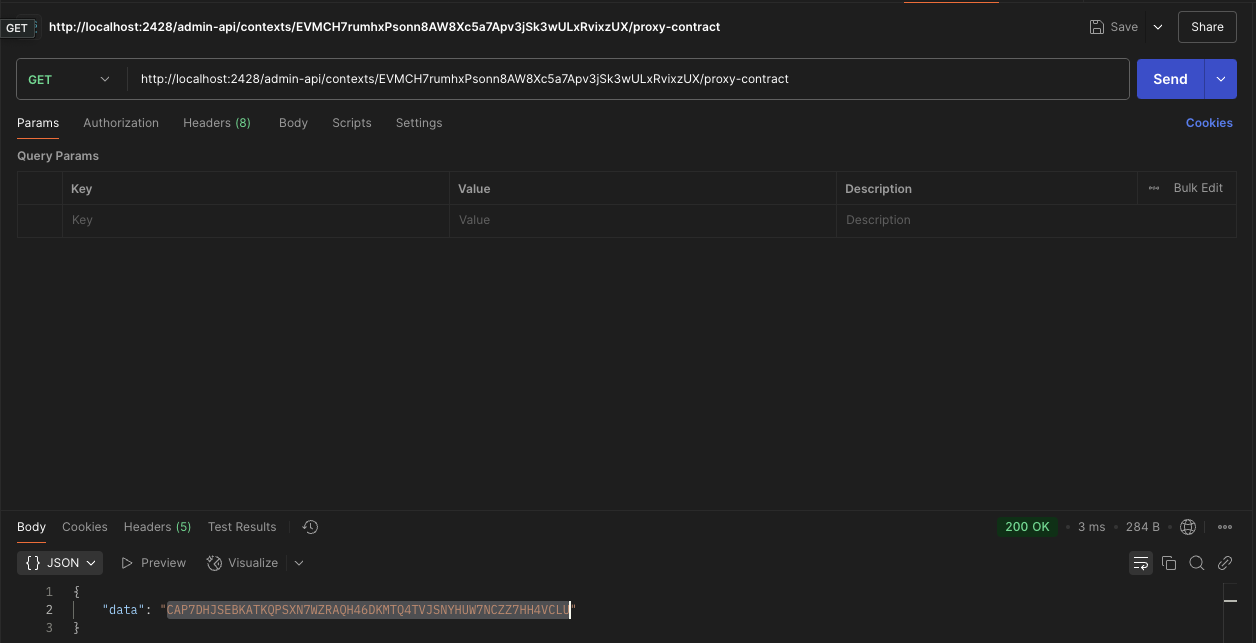
We have now installed the application and created context. To be able to fully use proxy contract we need to fund it. To get proxy contract address we need to use API GET call to retrieve it from the node.
The 3 running nodes are located on:
Any of them can be queried to get the value of proxy contract id.
API endpoint to fetch proxy contract id is:
http://localhost:2428/admin-api/contexts/CONTEXT_ID/proxy-contract
CONTEXT_ID can be copied from previous steps
And for our case it is:
http://localhost:2428/admin-api/contexts/7krojDziAKRWP8KrUD8aYGL3z5peScNxPXaBWTKCFr2h/proxy-contract
Example of request in postman:
With proxy contract id we can now fund it using Stellar CLI.
To be able to fund the contract we need to create a testnet account and seed it with tokens.
You can create a testnet account and automatically fund it by using Stellar CLI:
stellar keys generate --global <NAME_OF_ACCOUNT> --network testnet --fund
Where:
<NAME_OF_ACCOUNT>is the name of the account you want to create.
To get the account address you can use the following command:
stellar keys address <NAME_OF_ACCOUNT>
> <ACCOUNT_ADDRESS>
Now you can fund the contract by using the following command:
stellar contract invoke \
  --id CDLZFC3SYJYDZT7K67VZ75HPJVIEUVNIXF47ZG2FB2RMQQVU2HHGCYSC \
  --source <NAME_OF_ACCOUNT> \
  --network testnet \
  -- transfer \
  --from <ACCOUNT_ADDRESS> \
  --to <PROXY_CONTRACT_ID> \
  --amount 100000000
Where:
<NAME_OF_ACCOUNT>is the name of the account for signing the transaction.CDLZFC3SYJYDZT7K67VZ75HPJVIEUVNIXF47ZG2FB2RMQQVU2HHGCYSCis the address of the Stellar testnet ledger contract.<ACCOUNT_ADDRESS>is the address of the account you created.<PROXY_CONTRACT_ID>is the address of the proxy contract you want to fund.100000000is the amount of lumens you want to fund the contract with. (1 XLM = 10000000)
To verify contract balance you can check it on Stellar Explorer by visiting:
https://stellar.expert/explorer/testnet/contract/<PROXY_CONTRACT_ID>
Blockchain Demo Application
This application is used to demonstrate how to interact with Calimero Proxy contract through creating, approving and executing proposals.
The proxy contract supports the following types of proposals:
- External function call - Enables cross-contract call execution.
- Transfer - Allows transferring funds.
- Set approval threshold - Specifies the number of approvals required for proposal execution.
- Set active proposal limit - Defines the maximum number of active proposals.
- Set context variables - Allows setting key-value pairs for context variables.
While the demo focuses on specific functionality, you can customize the application to suit your needs. Instead of building a complete frontend, this demo serves as a foundation that you can extend to create a fully-featured frontend application tailored to your requirements.
Navigate to frontend directory and install dependencies.
cd demo-blockchain-integrations/app && pnpm install
Since we have 3 nodes we will need to setup frontend for each of them. Open 3 terminals side by side and run the following commands in each of them from /app directory:
pnpm run dev
After running the frontend you should see the following output in each of the terminals:
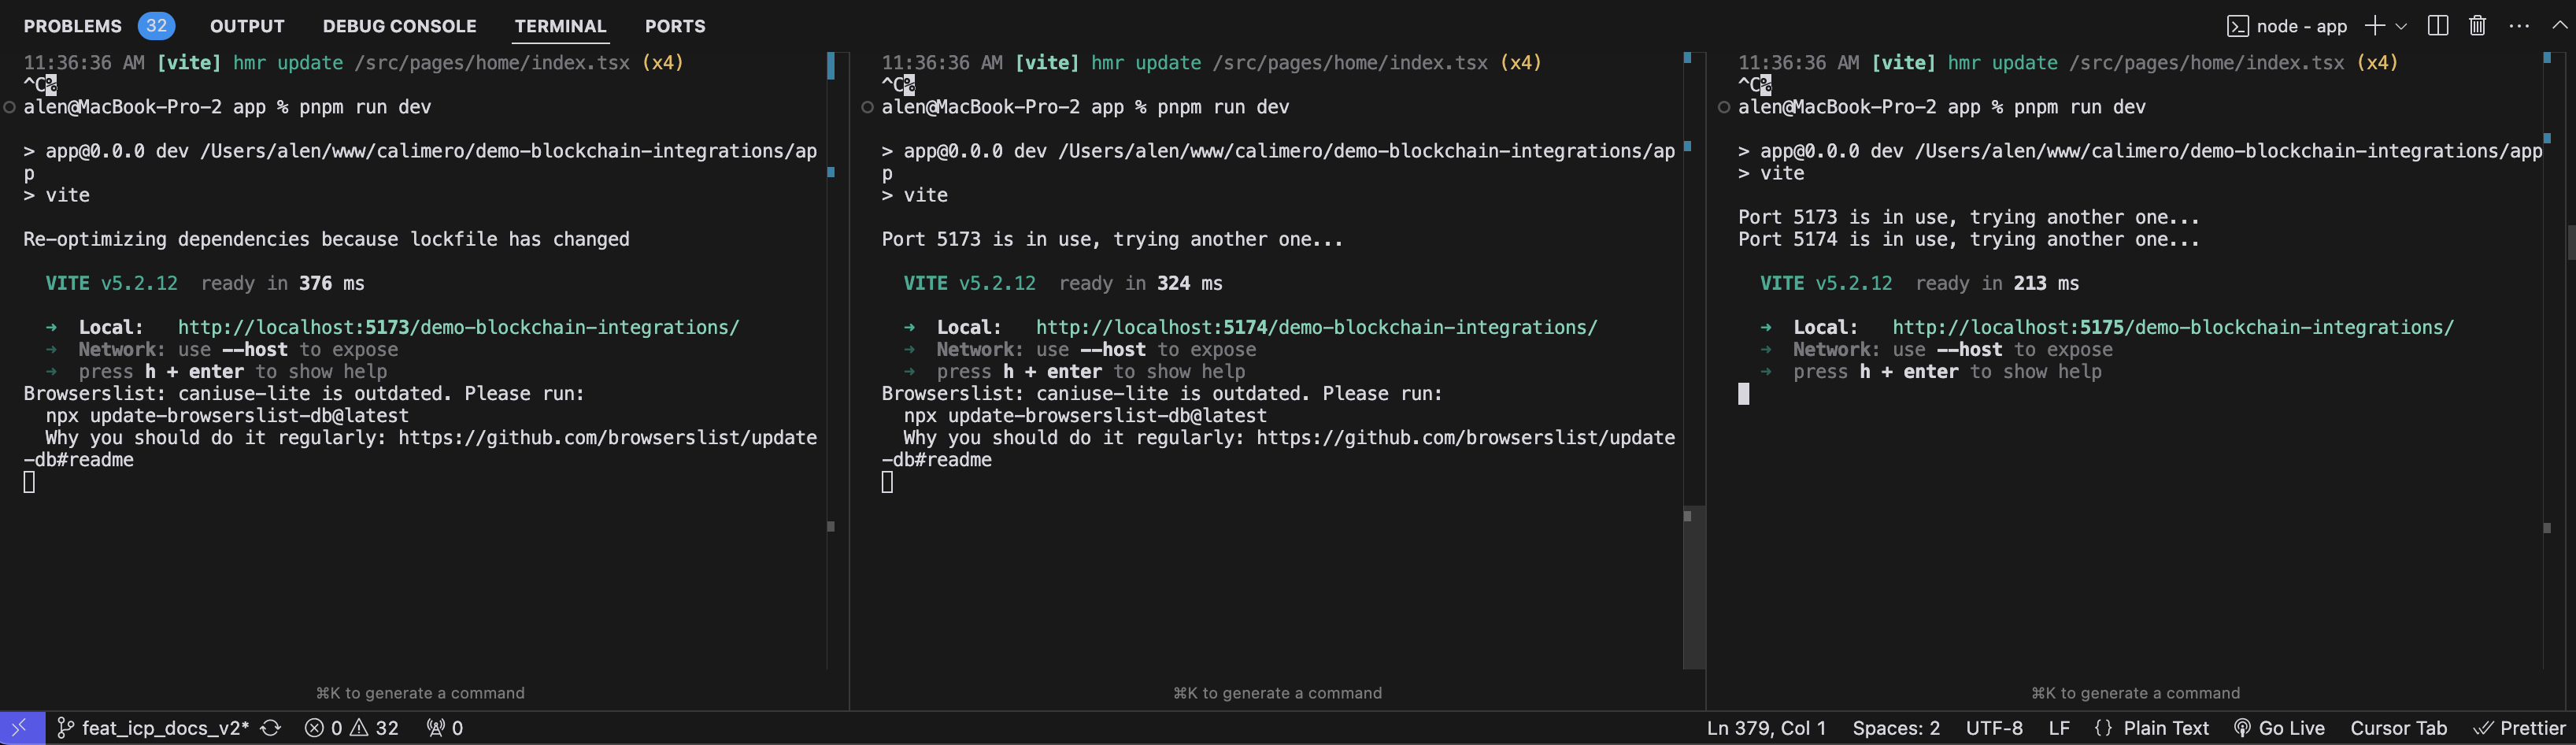
Open the applications in by clicking on the link in each of the terminals and you will see form with input fields for node URL and application ID.
To get application ID you can use following command from any of node terminals:
application ls
> <APPLICATION_ID>
The node URL of the nodes are respectively:
After submitting the form you will be redirected to admin dashboard where you will see the login page with wallet selector.
Select a wallet you wish to login with and afterwards you will be prompted to select the context and context identity you wish to use.
After selecting both you will be logged in and automatically redirected to the application.
Change Approval Threshold Proposal
First we are going to create an approval threshold change proposal so future proposals can be executed by only 1 node. As mentioned earlier each proposal by default needs 3 approvals to be executed.
- Click on "Create Proposal" button and select "Change number of approvals needed" from dropdown.
- In the input field set the number of approvals to 1 (this means that proposal will be executed on creation).
- Click on "Create Proposal" button to create the proposal.
After proposal is created you will get the alert that proposal is created and it will be shown in other frontend applications by selecting it in select field.
After selecting proposal on other frontend applications (node2 and node3) you can see that it is created and can be approved by clicking on "Approve Proposal" button.
Cross-Contract Call Proposal
At this point proposal approval threshold is 1, meaning proposal will be executed on creation. This means when we create cross-contract call proposal it will instantly be executed.
We have created a <DEMO_EXTERNAL_CONTRACT_ID> and deployed it on Stellar
testnet.
Its address is:
CAJF5BPK4AT7UNVF4NDXMUXDKXCBFV56H2TNMUJIX6WUSNFP4UMH7W46
It contains following methods:
- no_deposit - This method does not require a deposit for execution, it sets sent arguments in its storage.
- deposit - This method requires a deposit for execution, it first transfers the funds to the contract from proxy contract and then sets sent arguments in its storage, if the transfer is completed successfully.
- get_calls - This method returns all calls stored in the contract.
- clear_state - This method clears the storage of the contract.
You can see the contract itself and its implementation here.
When creating cross-contract call proposal we need to provide following values:
-
Contract ID:
{DEMO_EXTERNAL_CONTRACT_ID}- Address of the external contract -
Method Name:
deposit- Name of the contract method that will be called -
Deposit: 10000000 - Deposit for transfer (1 XLM)
-
Arguments: The following arguments correspond to the deposit method parameters:
Type Value address {PROXY_CONTRACT_ID}i128 10000000 string testKEY string testVALUE

Supported Soroban argument types:
i32- 32-bit signed integeru32- 32-bit unsigned integeri64- 64-bit signed integeru64- 64-bit unsigned integeri128- 128-bit signed integeru128- 128-bit unsigned integerbool- Boolean valuestring- Text stringaddress- Contract or account addresssymbol- Symbol valuebytes- Byte array
After we create proposal it will be executed, and the success of the execution can be checked calling demo external contract method get_value with Stellar CLI:
stellar contract invoke \
  --id <DEMO_EXTERNAL_CONTRACT_ID> \
  --network testnet \
  --source <NAME_OF_ACCOUNT> \
  -- \
  get_value \
  --key "testKEY"
To check if transfer was successful we can use Stellar Explorer by visiting:
https://stellar.expert/explorer/testnet/contract/<DEMO_EXTERNAL_CONTRACT_ID>
There you will see the current funds attached to the contract.
The implementation of cross-contract call with deposit is based on the following steps:
- The contract detects that an attached deposit is present.
- It calls the ledger contract to enable the external contract (the contract being called) to withdraw funds.
- The external contract is called, and it must contain logic to withdraw the funds that have been allocated for it in the ledger contract.
- After the cross-contract call is completed, the proxy contract sets the allowance back to 0 to ensure security.
Conclusion
This tutorial has covered all the essential steps developers need to build an application for Calimero and Stellar, from environment overview to deploying a fully functional smart contract. By following this guide, you should now have a solid understanding of the development workflow and how to build your own Stellar application for Calimero.
Feel free to use our demo applications as a starting point to build and customize your own application. If you have any questions or need assistance, don't hesitate to reach out to us on Socials. We're here to help!