Invite To Context
Invite to context with Admin Dashboard
Currently not available
Invite node to context using interactive CLI
Inviting to the context consists of 3 steps:
- Identity Exchange: The peer wishing to join (invitee) shares their identity with the existing member (invitor).
- Create Invitation: The invitor generates an invitation payload for the context.
- Accept Invitation: The invitee signs the invitation payload to confirm their identity and join the context.
In the example below, Node 2 is the invitee, and Node 1 is the invitor.
Step-by-Step Process
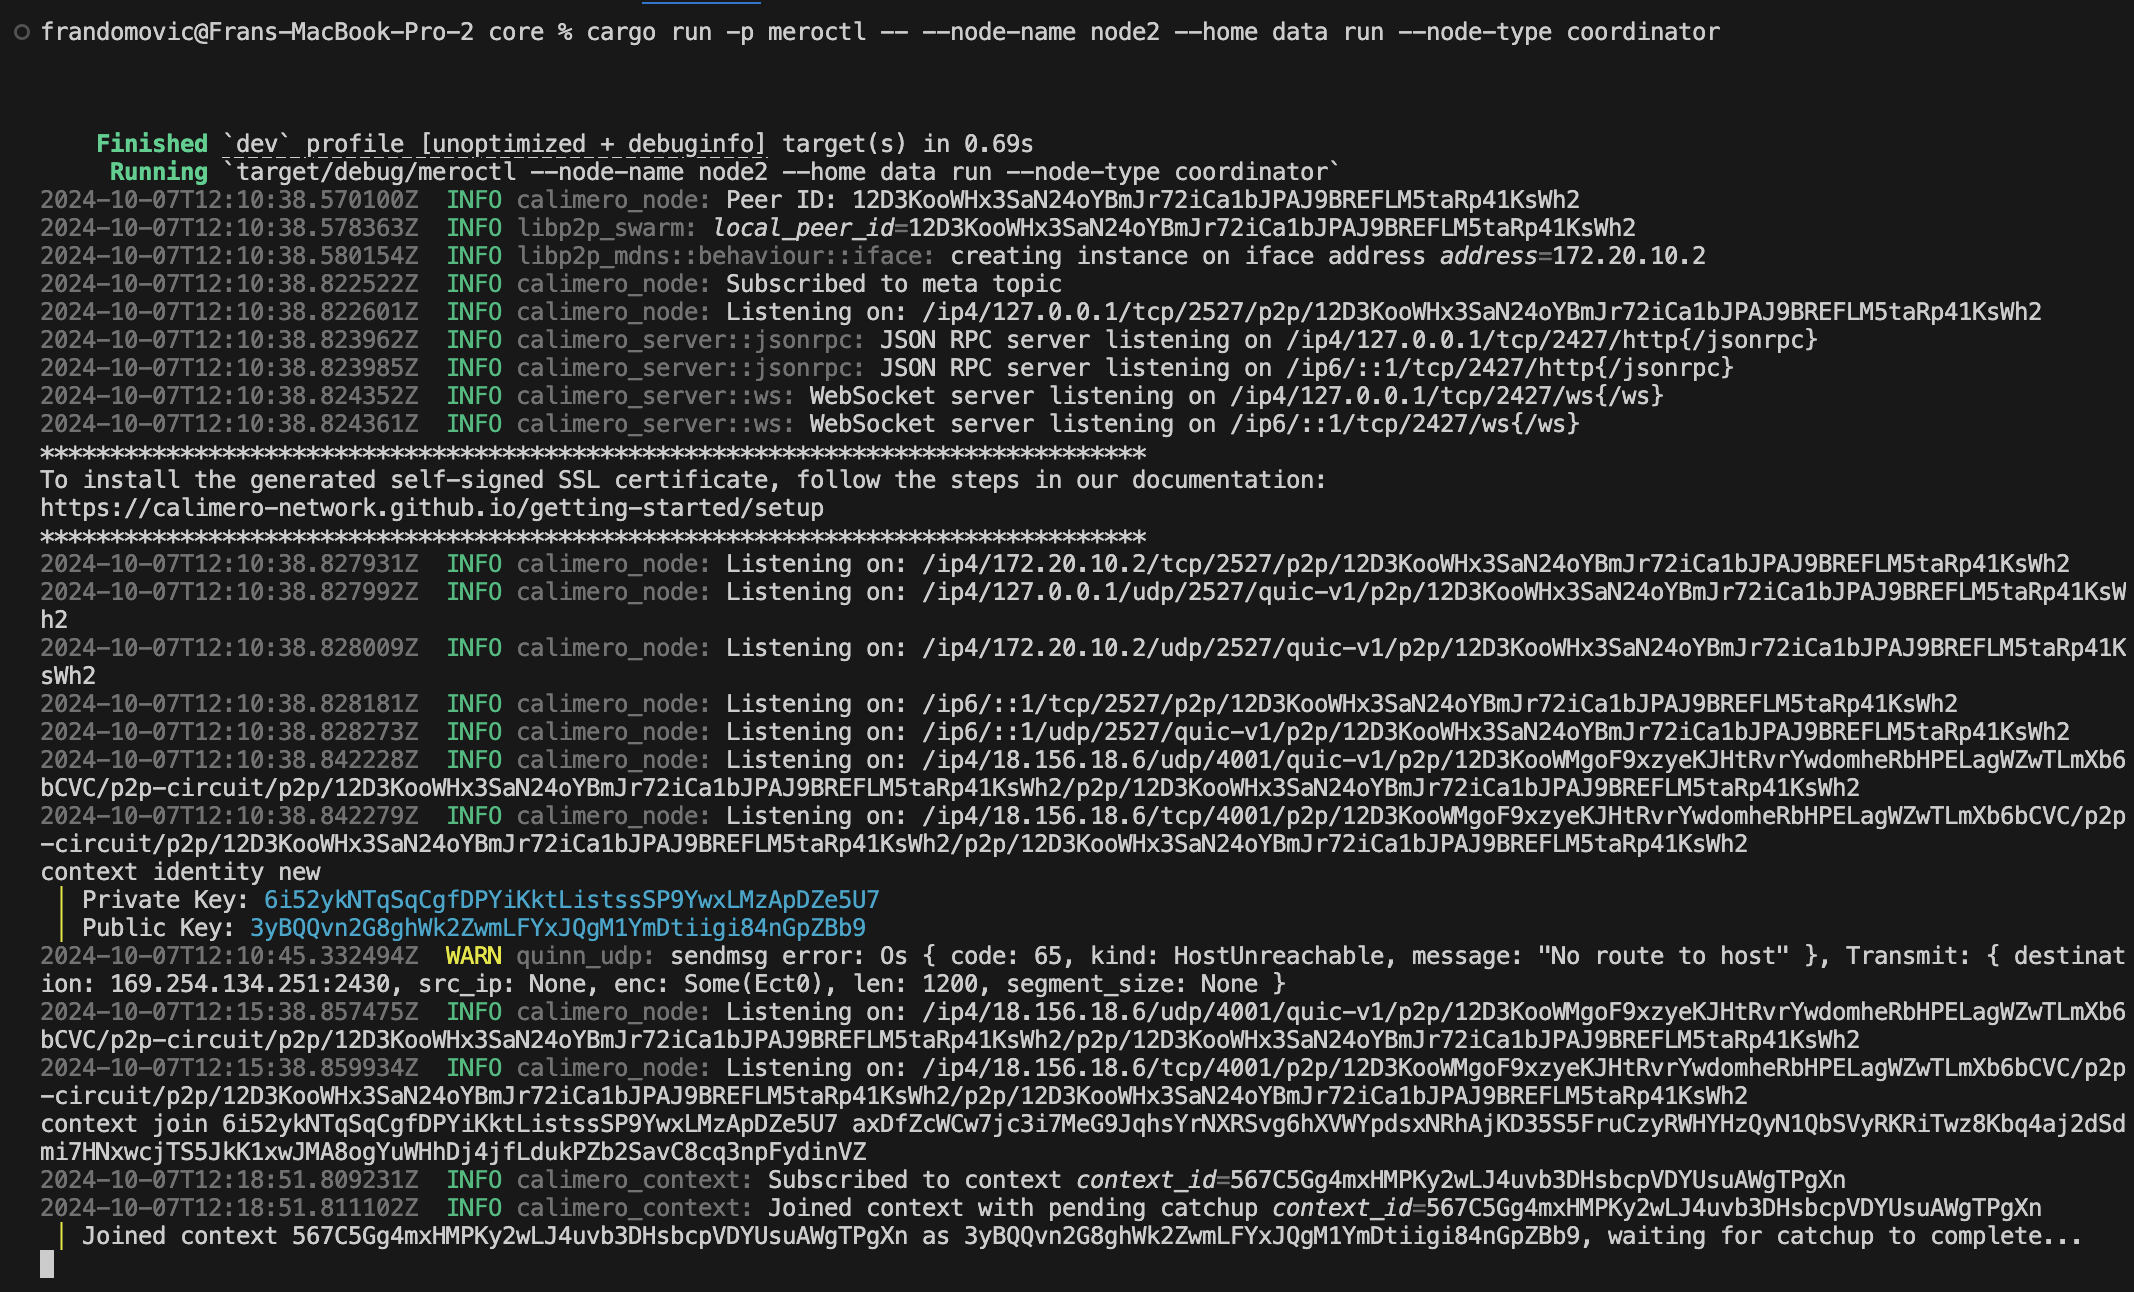
- Invitee Generates and Shares Identity To join the context, the invitee must first create and share their identity with the invitor. This can be done using the following command:
Node 2
identity new
This generates a private and public key pair, where the public key is the inviteeContextIdentity. Share this public key with the invitor.
Example
identity new
│ Private Key: 6i52ykNTqSqCgfDPYiKktListssSP9YwxLMzApDZe5U7
│ Public Key: 3yBQQvn2G8ghWk2ZwmLFYxJQgM1YmDtiigi84nGpZBb9
- Invitor Creates an Invitation Once the invitee’s public key is shared, the invitor generates an invitation to the context using the following command:
Node 1
context invite {contextId} {invitorContextIdentity} {inviteeContextIdentity}
Example
context invite 567C5Gg4mxHMPKy2wLJ4uvb3DHsbcpVDYUsuAWgTPgXn DaSkad6DK7f6fUhjz1CvNW7L4TkWZmWqAcwysZHG3Xs5 3yBQQvn2G8ghWk2ZwmLFYxJQgM1YmDtiigi84nGpZBb9
│ Invited 3yBQQvn2G8ghWk2ZwmLFYxJQgM1YmDtiigi84nGpZBb9 to context 567C5Gg4mxHMPKy2wLJ4uvb3DHsbcpVDYUsuAWgTPgXn
│ Invitation Payload: axDfZcWCw7jc3i7MeG9JqhsYrNXRSvg6hXVWYpdsxNRhAjKD35S5FruCzyRWHYHzQyN1QbSVyRKRiTwz8Kbq4aj2dSdmi7HNxwcjTS5JkK1xwJMA8ogYuWHhDj4jfLdukPZb2SavC8cq3npFydinVZ
To check the invitor's identity, use this command:
Node 1
identity ls {contextId}
Example
identity ls 567C5Gg4mxHMPKy2wLJ4uvb3DHsbcpVDYUsuAWgTPgXn
│ Identity                                     |  Owned │
| DaSkad6DK7f6fUhjz1CvNW7L4TkWZmWqAcwysZHG3Xs5 | *
Listed identity is invitorContextIdentity used above.
- Invitee Accepts the Invitation After receiving the invitation payload from the invitor, the invitee can accept the invitation by signing it with their private key:
Node 2
context join {inviteePrivateKey} {invitationPayload}
Example
context join 6i52ykNTqSqCgfDPYiKktListssSP9YwxLMzApDZe5U7 axDfZcWCw7jc3i7MeG9JqhsYrNXRSvg6hXVWYpdsxNRhAjKD35S5FruCzyRWHYHzQyN1QbSVyRKRiTwz8Kbq4aj2dSdmi7HNxwcjTS5JkK1xwJMA8ogYuWHhDj4jfLdukPZb2SavC8cq3npFydinVZ
2024-10-07T12:18:51.809231Z  INFO calimero_context: Subscribed to context context_id=567C5Gg4mxHMPKy2wLJ4uvb3DHsbcpVDYUsuAWgTPgXn
2024-10-07T12:18:51.811102Z  INFO calimero_context: Joined context with pending catchup context_id=567C5Gg4mxHMPKy2wLJ4uvb3DHsbcpVDYUsuAWgTPgXn
│ Joined context 567C5Gg4mxHMPKy2wLJ4uvb3DHsbcpVDYUsuAWgTPgXn as 3yBQQvn2G8ghWk2ZwmLFYxJQgM1YmDtiigi84nGpZBb9, waiting for catchup to complete...
- Verifying Context Membership To confirm successful joining of the context, the invitee can list their contexts with the following command:
Node 2
context ls
Example
context ls
│ Context ID                                   | Application ID                               | Last Transaction
│ 567C5Gg4mxHMPKy2wLJ4uvb3DHsbcpVDYUsuAWgTPgXn | Ahe2vLWLgswJARv5LsafXp7uJyb2Ba9GjzUSeLc71gUF | b3ipivssRRm1ehRTSpUD3GKdUpvi3vq311pCT4iLvui

- The invitee can also list identities in the context
Node 2
identity ls {contextId}
Example
identity ls 567C5Gg4mxHMPKy2wLJ4uvb3DHsbcpVDYUsuAWgTPgXn
│ Identity                                     | Owned
│ 3yBQQvn2G8ghWk2ZwmLFYxJQgM1YmDtiigi84nGpZBb9 | *
│ DaSkad6DK7f6fUhjz1CvNW7L4TkWZmWqAcwysZHG3Xs5 |

Was this page helpful?